For Individuals
 Data Recovery
 File Repair
 Data Erasure
  For Business
 Email Repair
 Email Converter
 Email Migration
 File & Database Repair
  Toolkit
 Forensic
 Lab Services
 Our Partners
 About
About Company
 Leadership
  Media Coverage
 Press Releases
 Career
  Resources
 Case Studies
 Blogs
Blogs  Articles
  Videos
  Support
 Contact us

Steps to assign full control to user in Microsoft 365
1. Login to Microsoft 365 Exchange Admin Center (https://admin.cloud.microsoft/exchange#/publicfolders) and select Public folders.
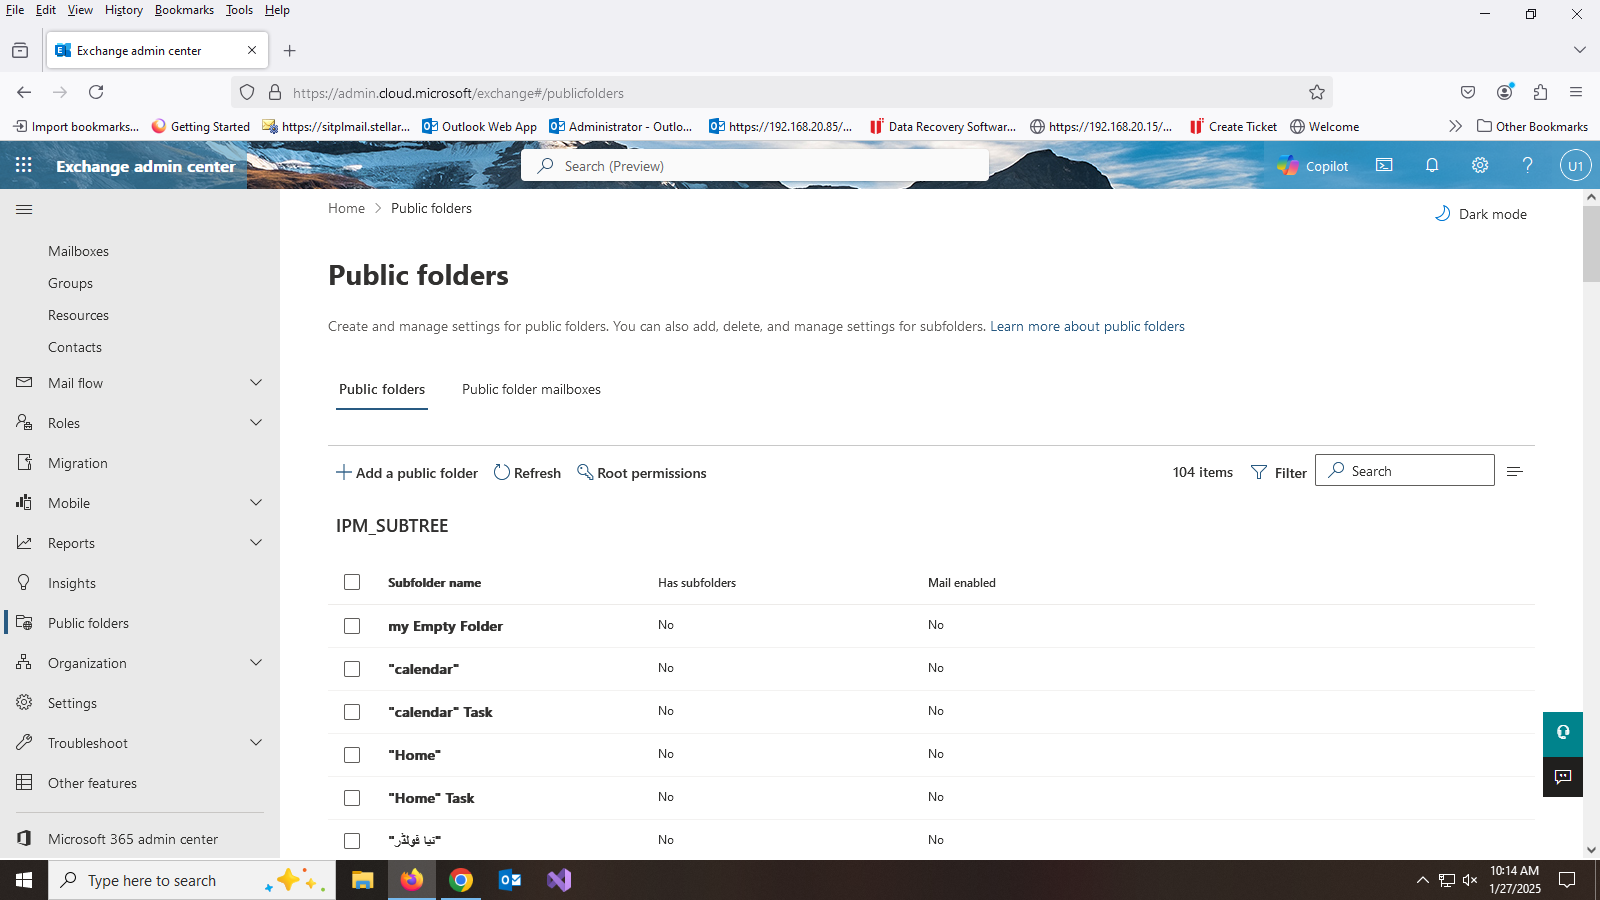
2. Select Root permissions.
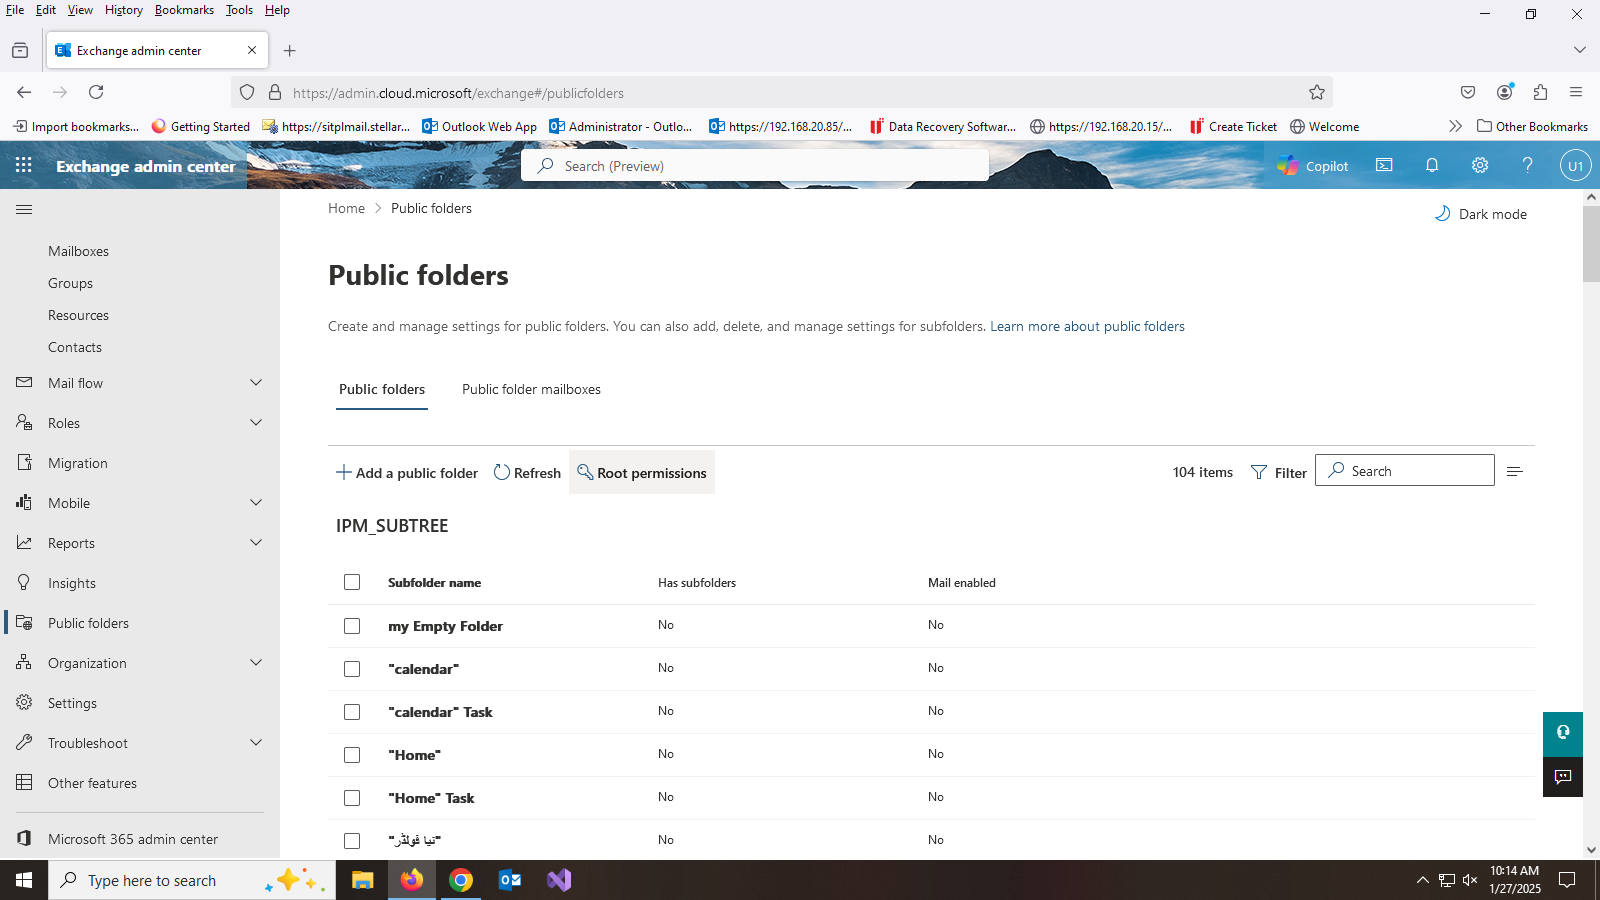
3. Select Add permissions from the Folder permissions window.
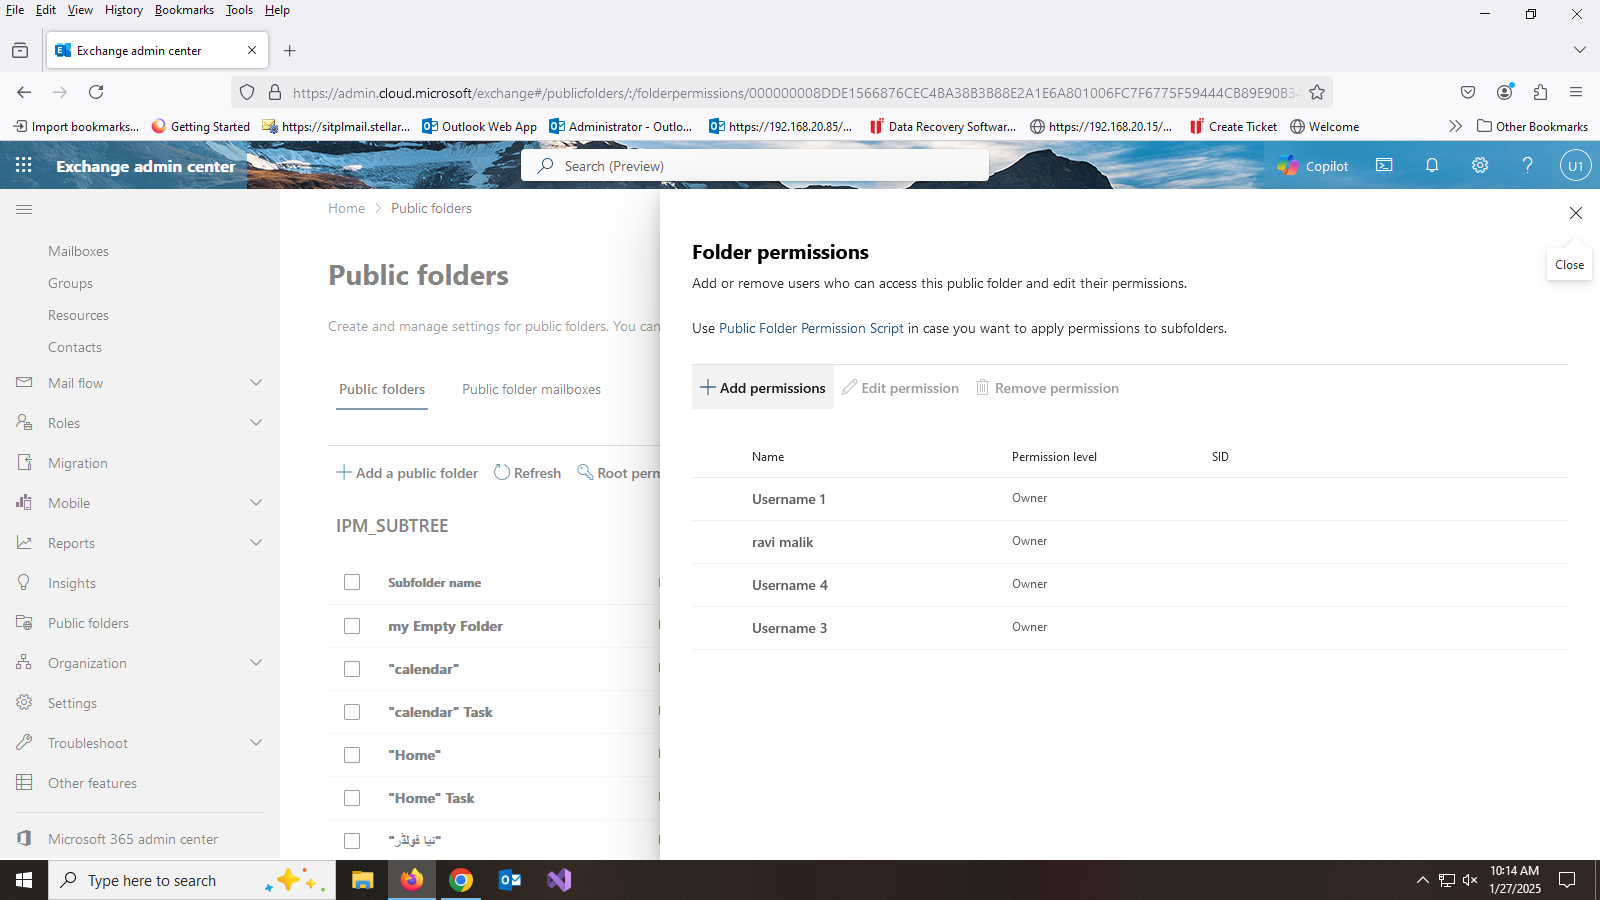
4. Here, you can find three sections. The first allows you to select the user to whom you wish to grant access to the public folder.
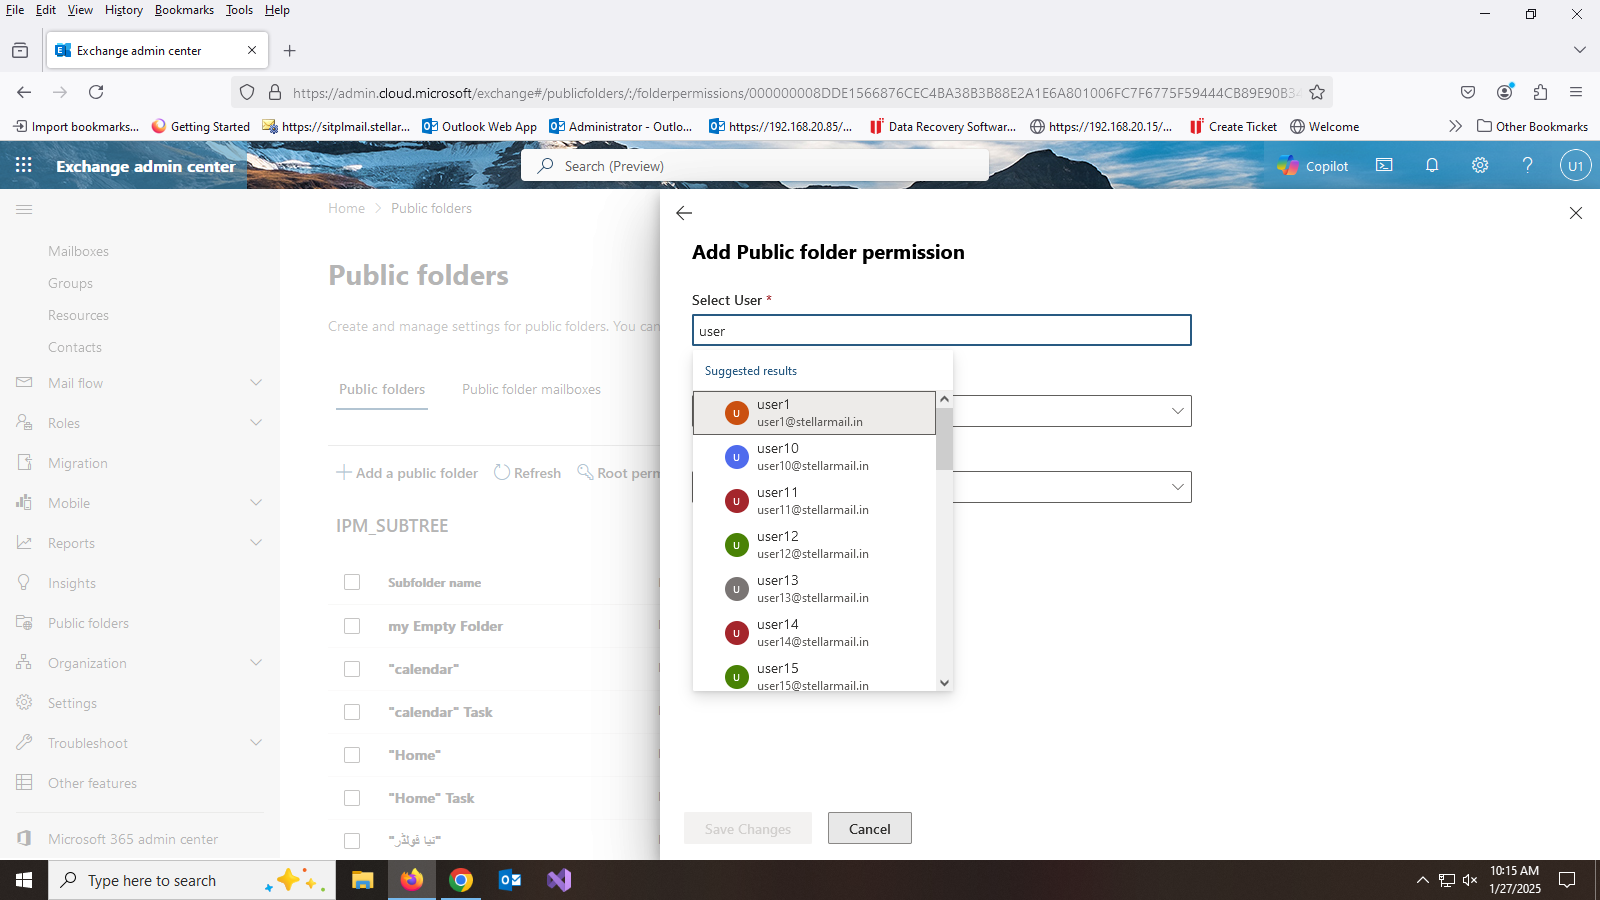
5. In the second section, indicate the permission level for the user.
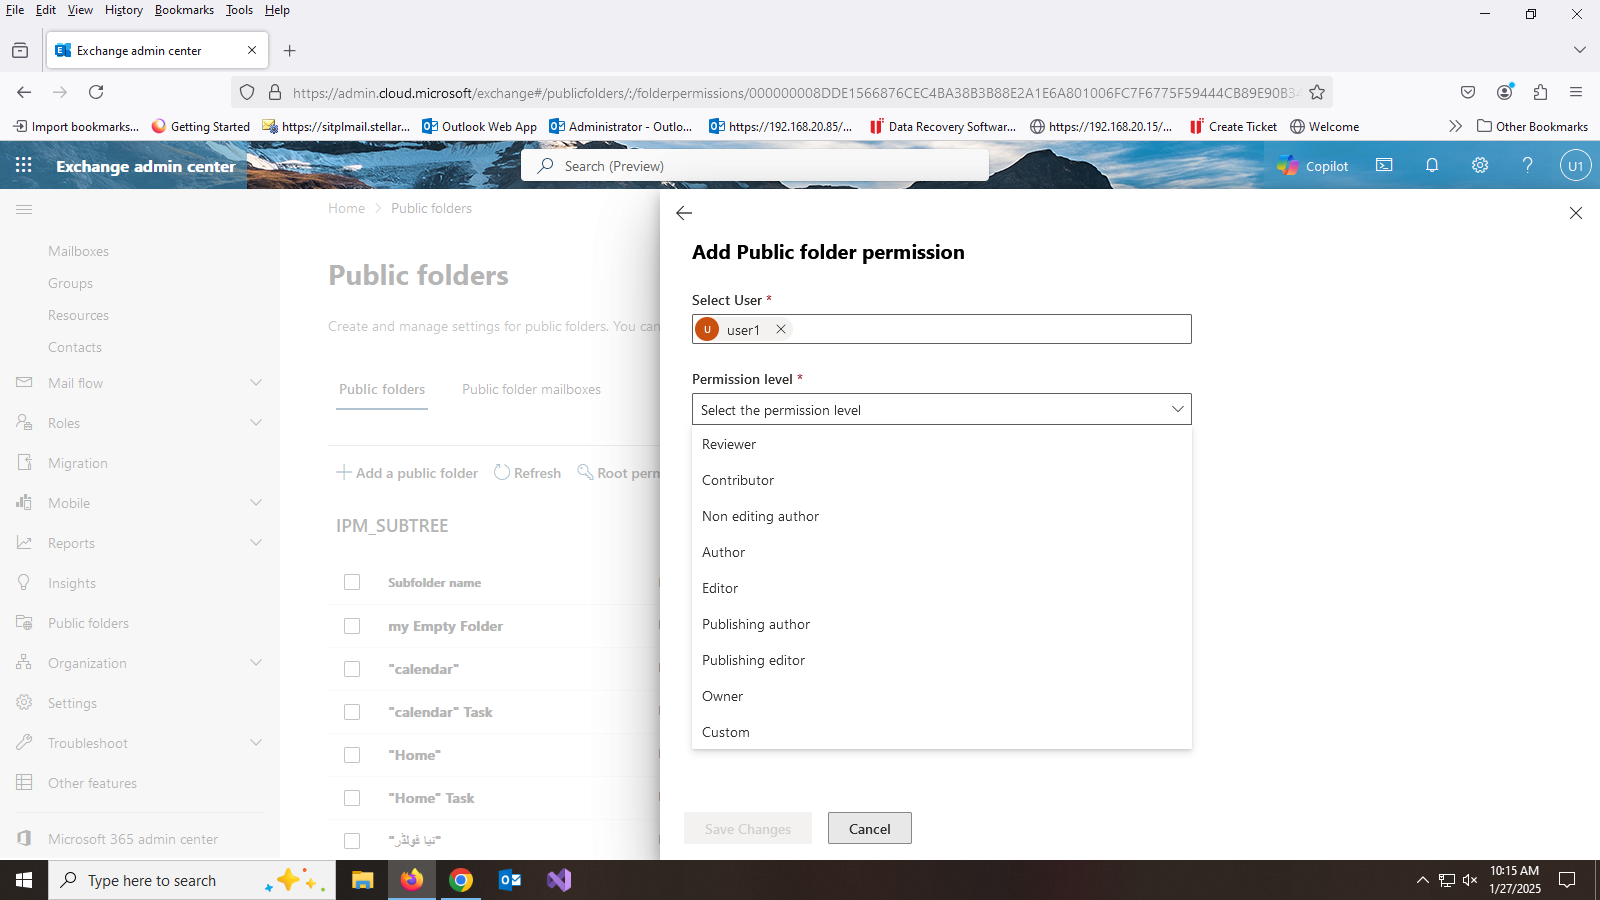
6. The third section specifies the permissions options (like read, edit etc.) to be granted to the selected user.
 to be granted to the selected user..png)
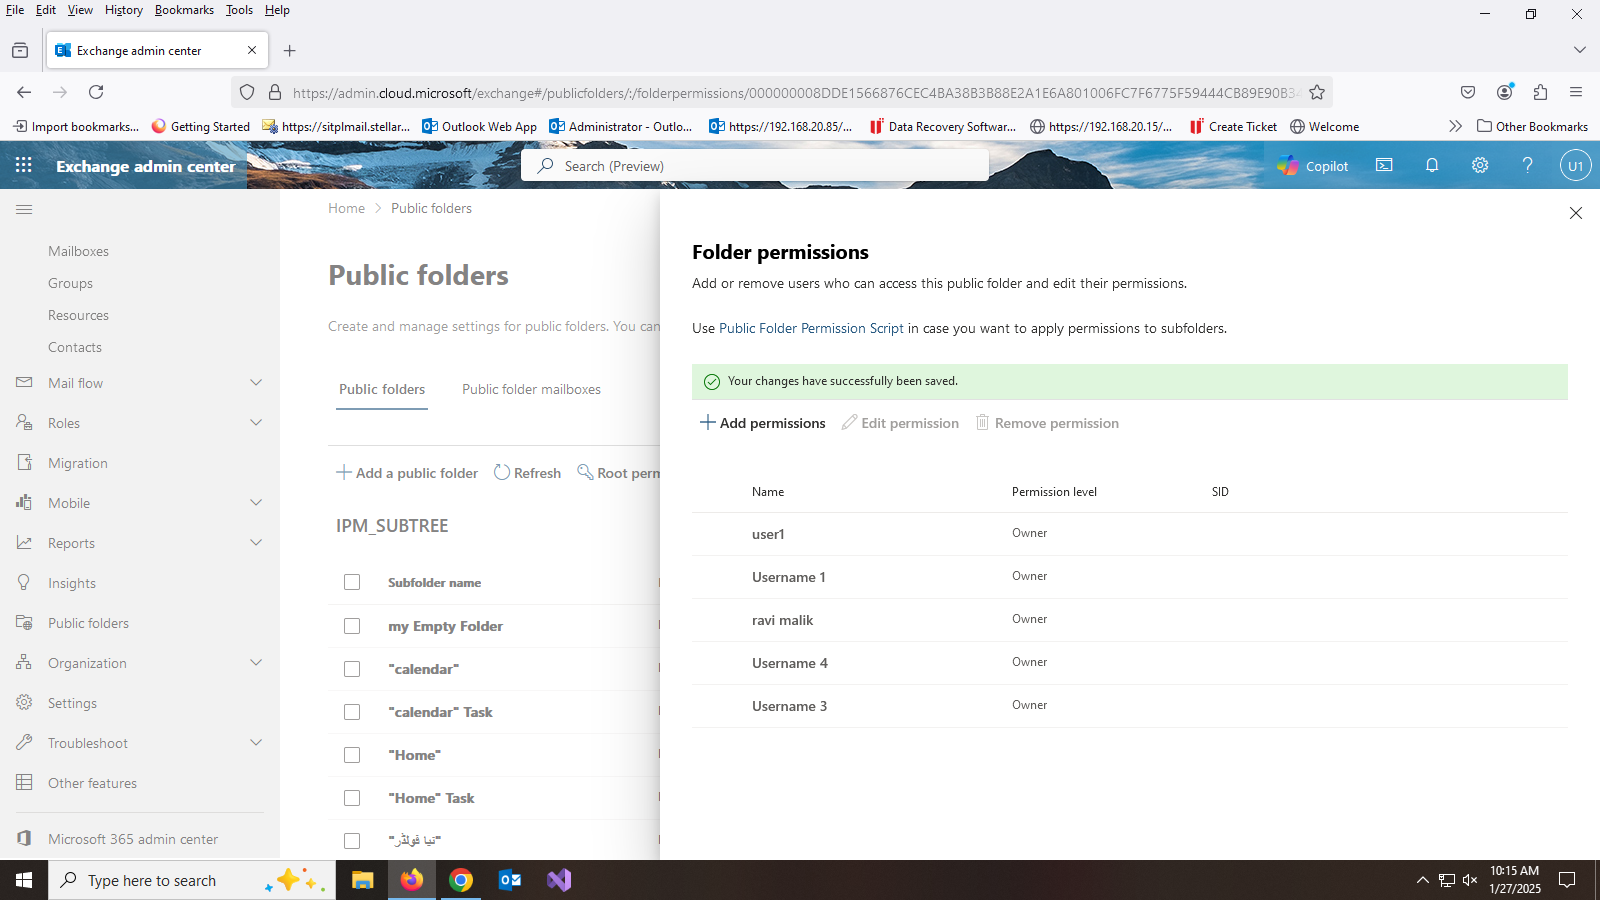
7. Click on Save Changes.
Steps to assign full control to user in Exchange 2013, 2016, 2019
1. Login to Exchange Admin Center and select public folders.
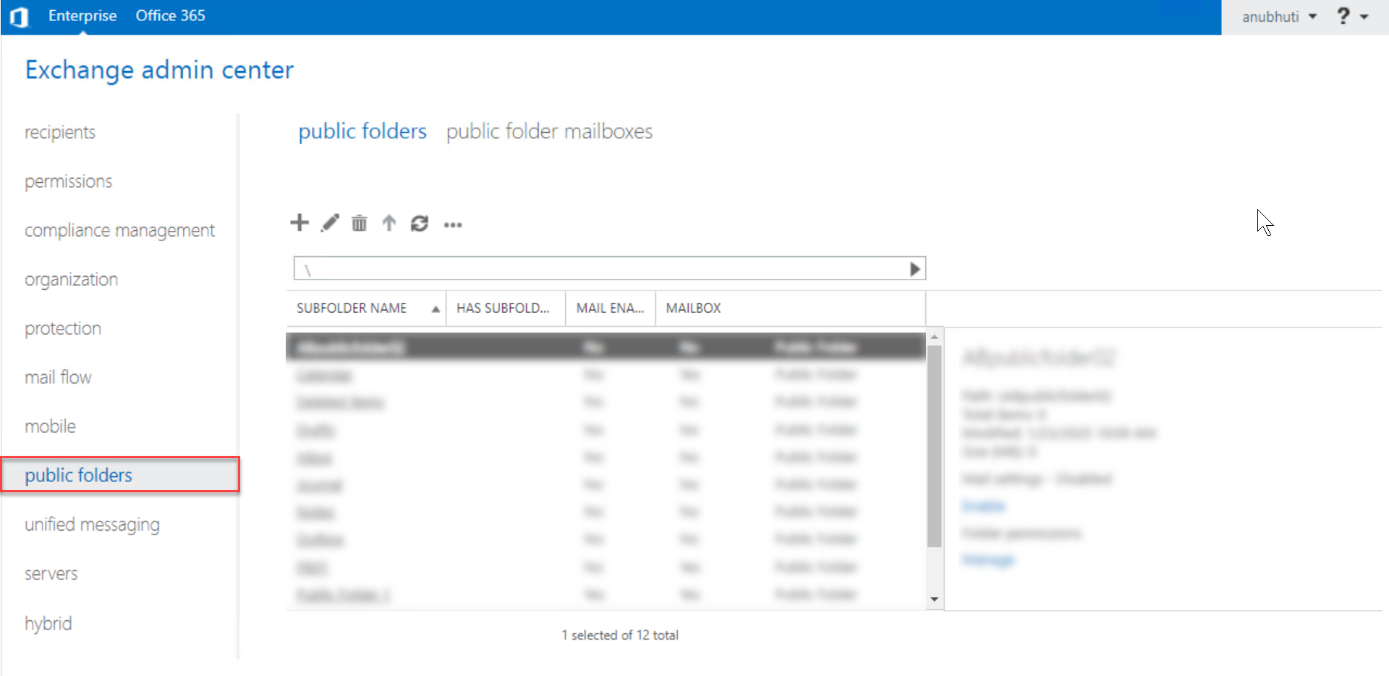
Note: In the Exchange admin center in Exchange Online (Microsoft 365) you need to expand the Public folders item in the menu and select Public folders.
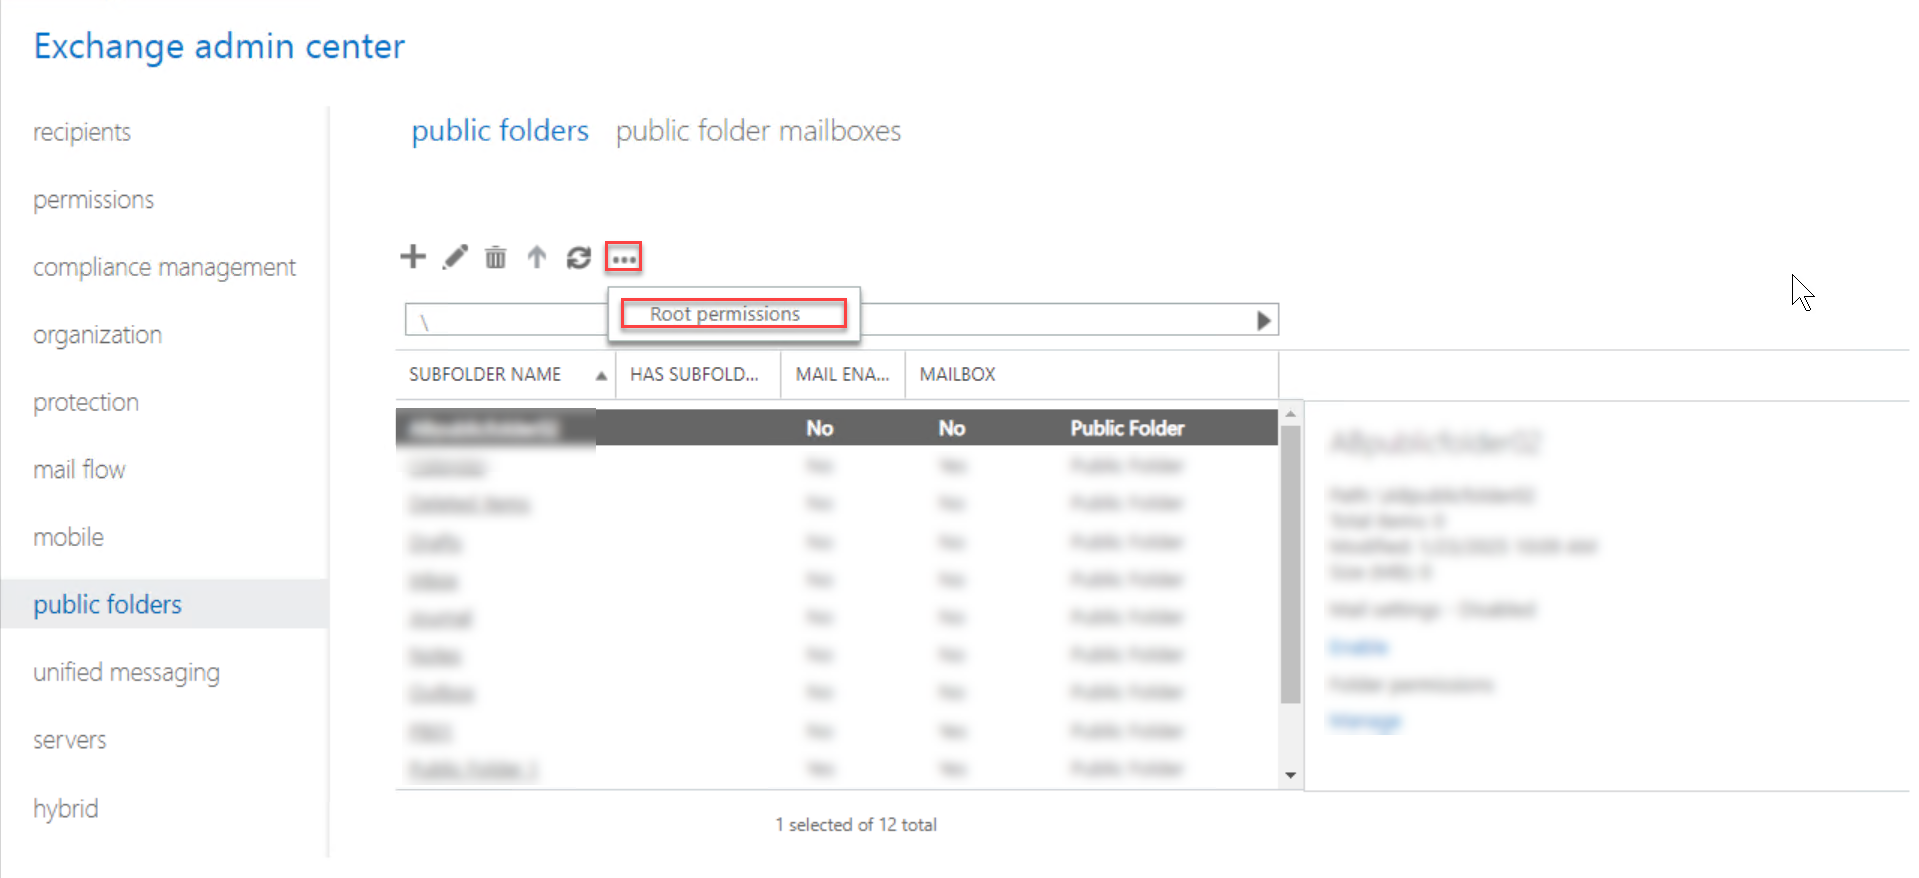
2. Select the Public Folder for which you want to grant the permissions, click on the ellipsis button, and select Root permissions.
3. In the new window, click on the add button
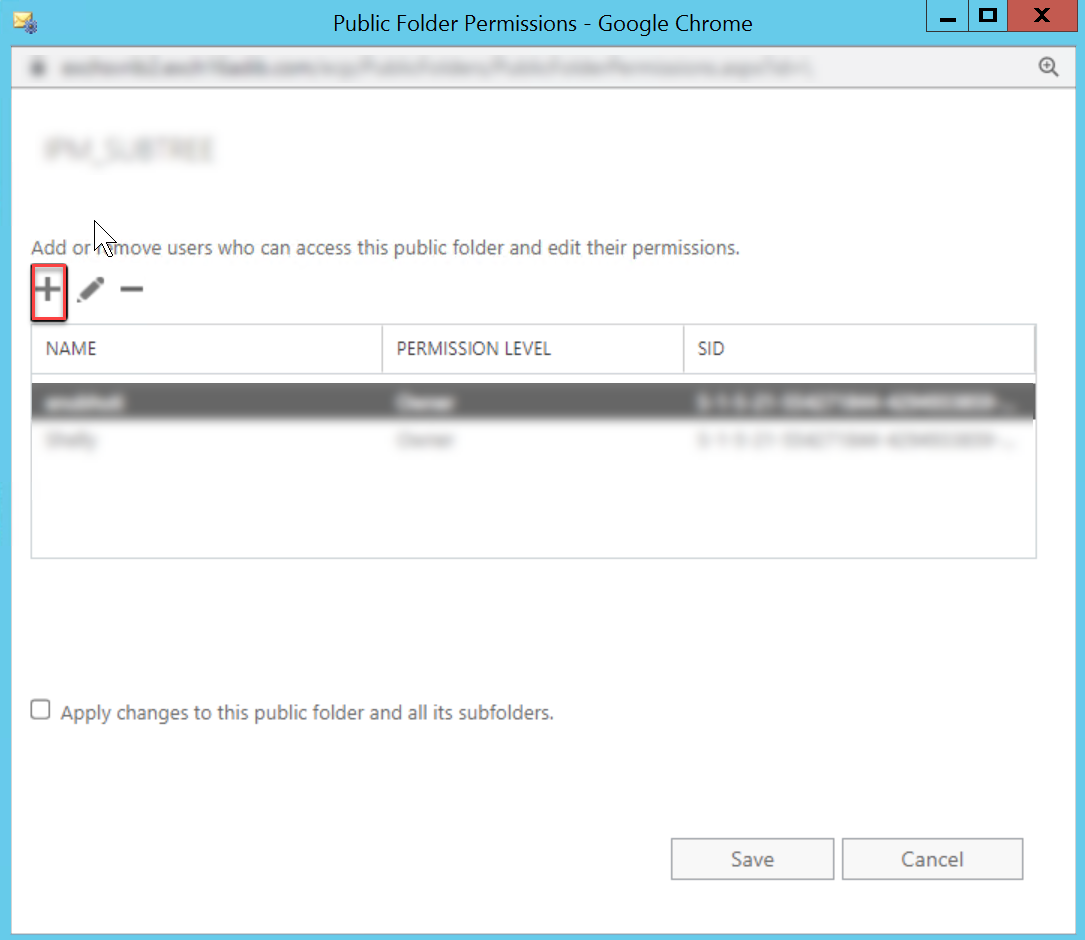
4. In the window, click on the drop down next to permission level and select owner. Then click on Browse
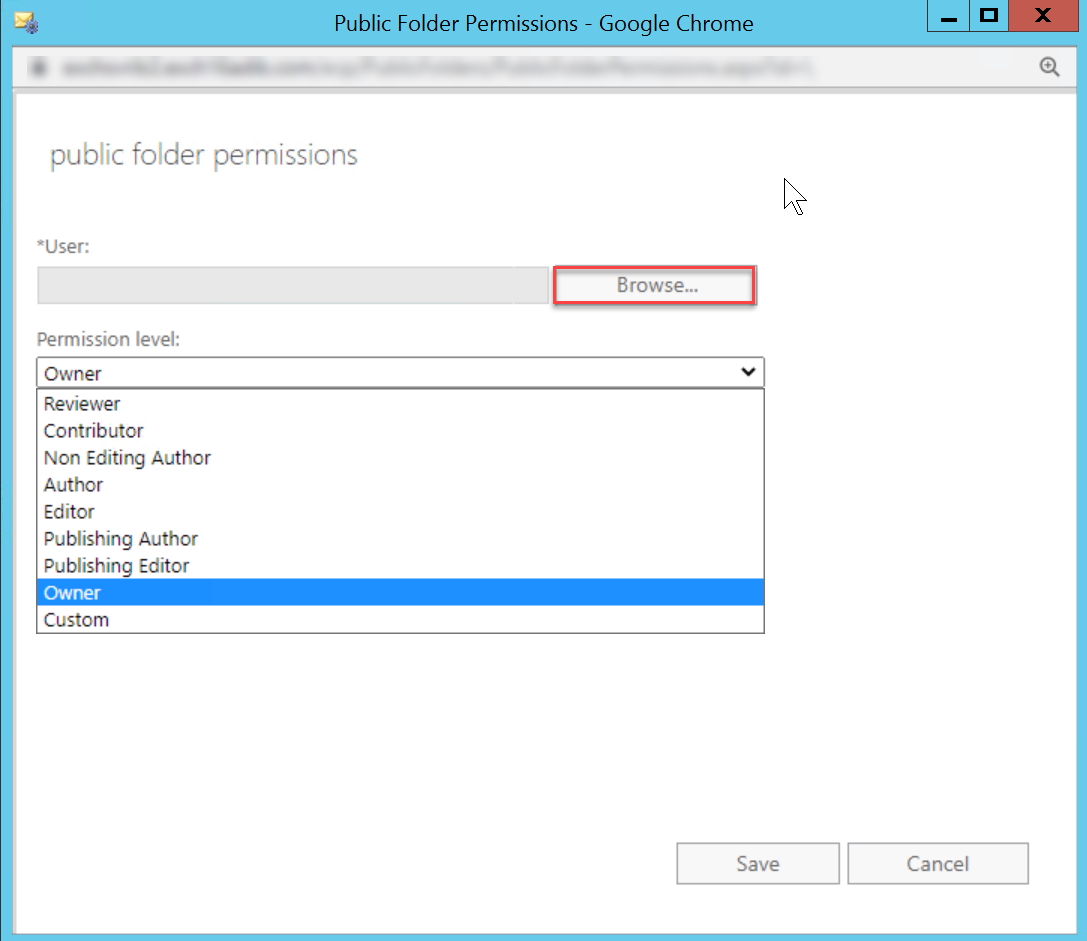
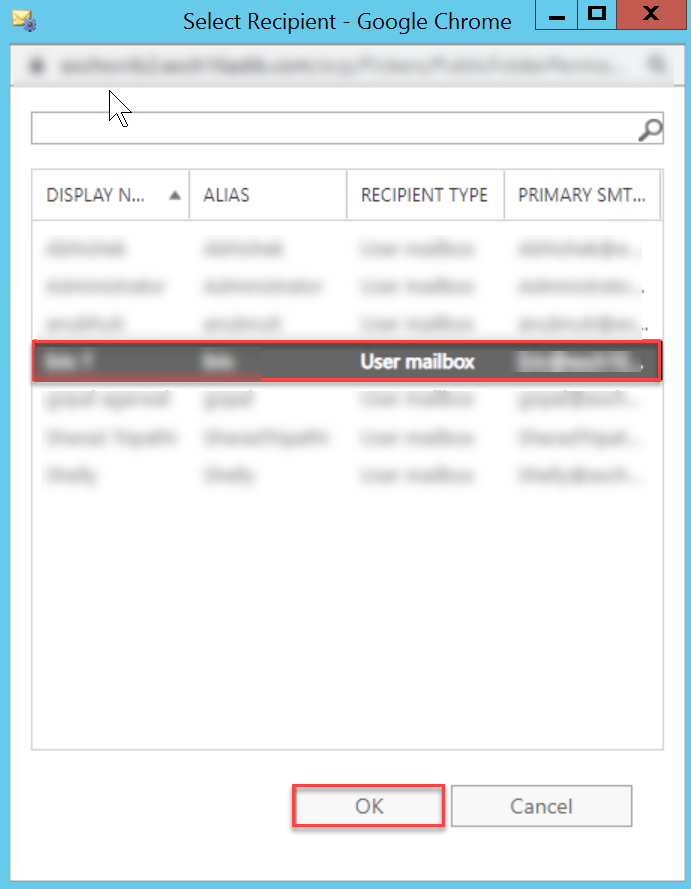
5. From the user list, select the account that you are using to migrate public folders and click OK.
6. Click on Save (as shown in the image)
.png)
7. Check the Apply changes to this public folder and all its subfolders checkbox and click on Save.
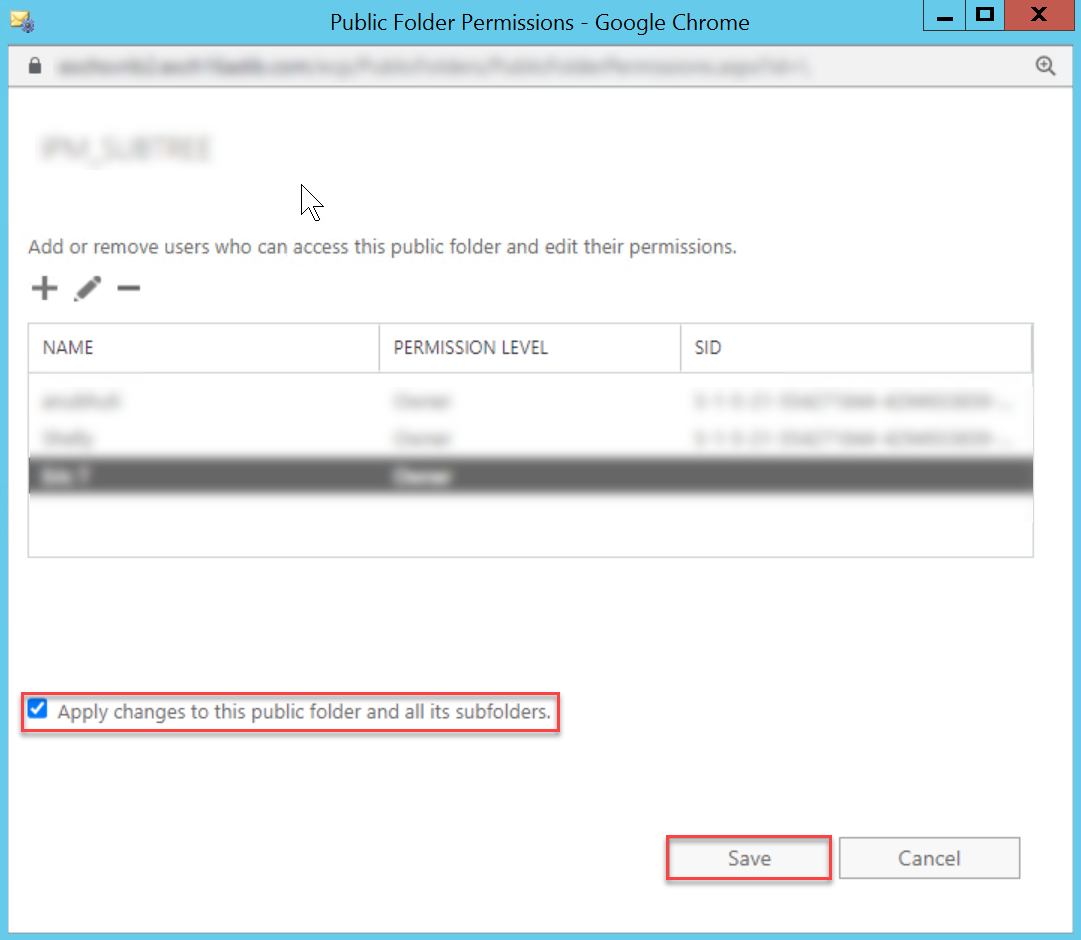
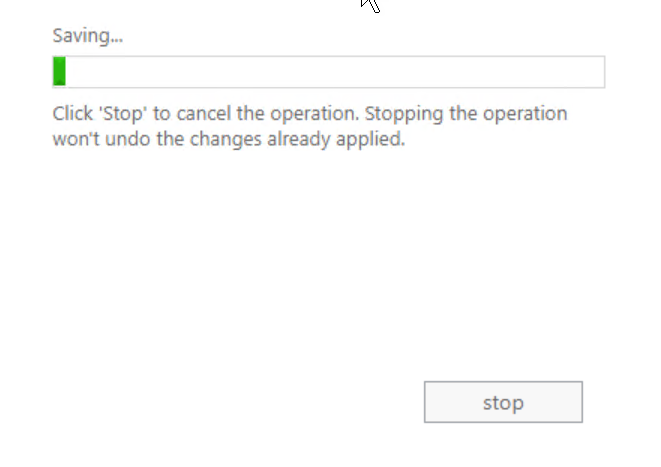
8. A progress bar will appear on the screen. Once the process is completed, click Close.
Grant Full Access Permissions to Public Folders in Exchange Server 2010 Using ADSIEdit
1. Press Start > Run.
2. Type ADSIEdit.msc and press Enter.
3. From the menu, click Action > Connect to.
4. In the Connection Point group box, choose Select a well known Naming Context.
5. Select Configuration from the drop-down list and click OK.
6. In the left pane, expand the following nodes:
a. CN=Configuration,DC=
b. CN=Services
c. CN=Microsoft Exchange
d. CN=
e. CN=Administrative Groups
f. CN=Exchange Administrative Group (FYDIBOHF23SPDLT)
7. Select CN=Folder Hierarchies.
8. In the central pane, locate and right-click CN=Public Folders, then select Properties.
9. Go to the Security tab.
10. Check if the target user or admin account appears under Group or user names:
a. If not, click Add, type the user's name, and click Check Names to verify.
b. Once verified, click OK.
11. Select the user, then select the Full control checkbox in the Allow column.
12. Click OK to apply changes.
13. (Optional) Use the GUID for Permissions
a. In ADSI Edit, right-click CN=Public Folders and select Properties.
b. Go to the Attribute Editor tab and find the objectGUID attribute. Note its value.
c. Use the noted GUID to assign full permissions with the following cmdlet:
Add-ADPermission -Identity
Replace:
·
·
Access Denied Error – Possible Causes
An "Access Denied" error during migration of a Primary Mailbox, Shared Mailbox, or Archive Mailbox can occur due to the following reasons:
- Mailbox is Full
- The migration may fail with an "Access Denied" error if the mailbox has reached its storage limit.
- The issue will be resolved after freeing up mailbox space by deleting unnecessary data or increasing the mailbox quota.
- Mailbox Folders Have Never Been Opened
- If the mailbox folders have not been accessed since the mailbox was created, the migration may encounter an "Access Denied" error.
- Open the mailbox folders at least once, then rerun the migration job.
After addressing either of the above conditions, rerun the migration job and the issue should be resolved.