For Individuals
 Data Recovery
 File Repair
 Data Erasure
 For Business
 Email Repair
 Email Converter
 Email Migration
 File & Database Repair
 Toolkit
 Forensic
 Lab Services
 Our Partners
 About
 Company
 Leadership
 Media Coverage
 Press Releases
 Career
 Resources
 Case Studies
 Blogs
 Articles
 Videos
 Support
 Contact us


Stellar Data Recovery Professional for Mac facilitates the feature of saving the scanning result of the recovery process. Using the saved files users can resume the recovery process at a later stage.
Here’s how to leverage the feature of Save Scan and Load Scan. Follow these steps:
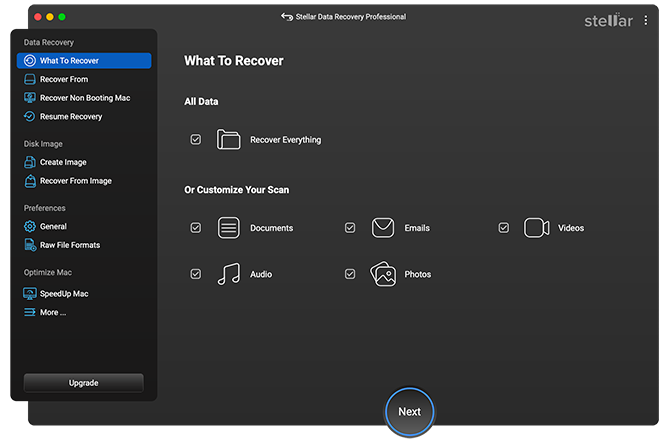
Step 1) Run >Data Recovery Mac software and select the data type and click Next
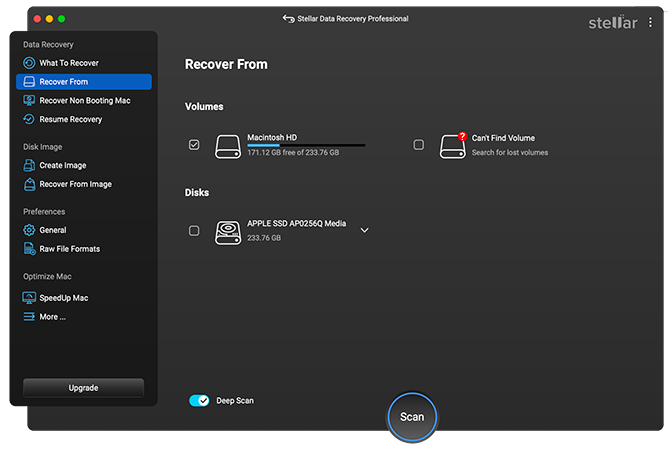
Step 2) Under Recover From, select the hard drive from where data needs to be recovered and click Scan.
Step 3) The software starts scanning the selected hard drive. Wait until the scan completes.

You can stop an ongoing scan process and the software will ask you to save the scan information at your desired location.

Step 4) The software saves the scan information at your provided location
Resuming Saved Scan Later!
This option is used to resume the recovery process from a saved scan information file.
- Run the Stellar Data Recovery software.
- Click on Stellar help icon and select the Resume Recovery option.

- A Resume Recovery window appears with a list of saved scan information file existing in the system.
- Select your desired saved scan file you wish to resume by clicking on it.

- Click Resume button. A screen showing the scanning process is displayed.