For Individuals
 Data Recovery
 File Repair
 Data Erasure
 For Business
 Email Repair
 Email Converter
 Email Migration
 File & Database Repair
 Toolkit
 Forensic
 Lab Services
 Our Partners
 About
 Company
 Leadership
 Media Coverage
 Press Releases
 Career
 Resources
 Case Studies
 Blogs
 Articles
 Videos
 Support
 Contact us


To register a new application in Entra ID, follow these steps:
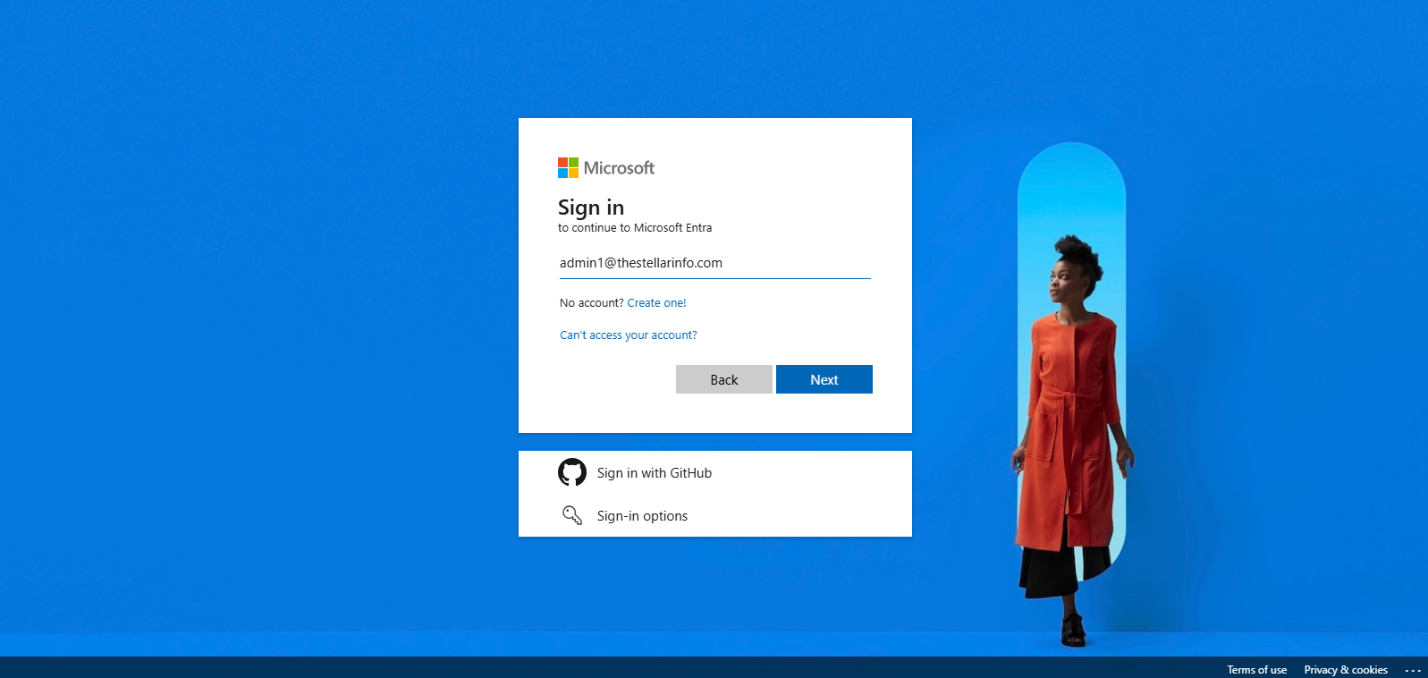
- Navigate to the Sign-in page of the Microsoft Entra admin center.
- Enter your email ID and click Next.
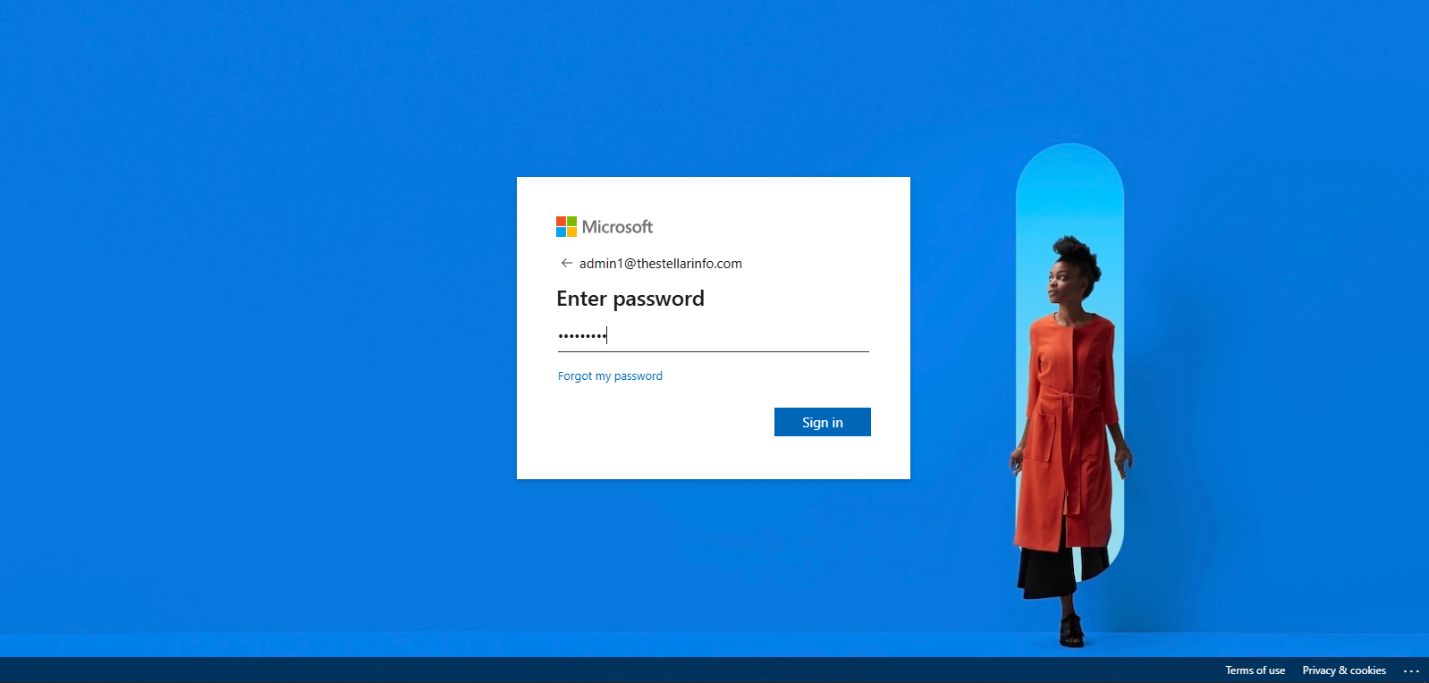
- Enter your password and
click the Sign-in button.
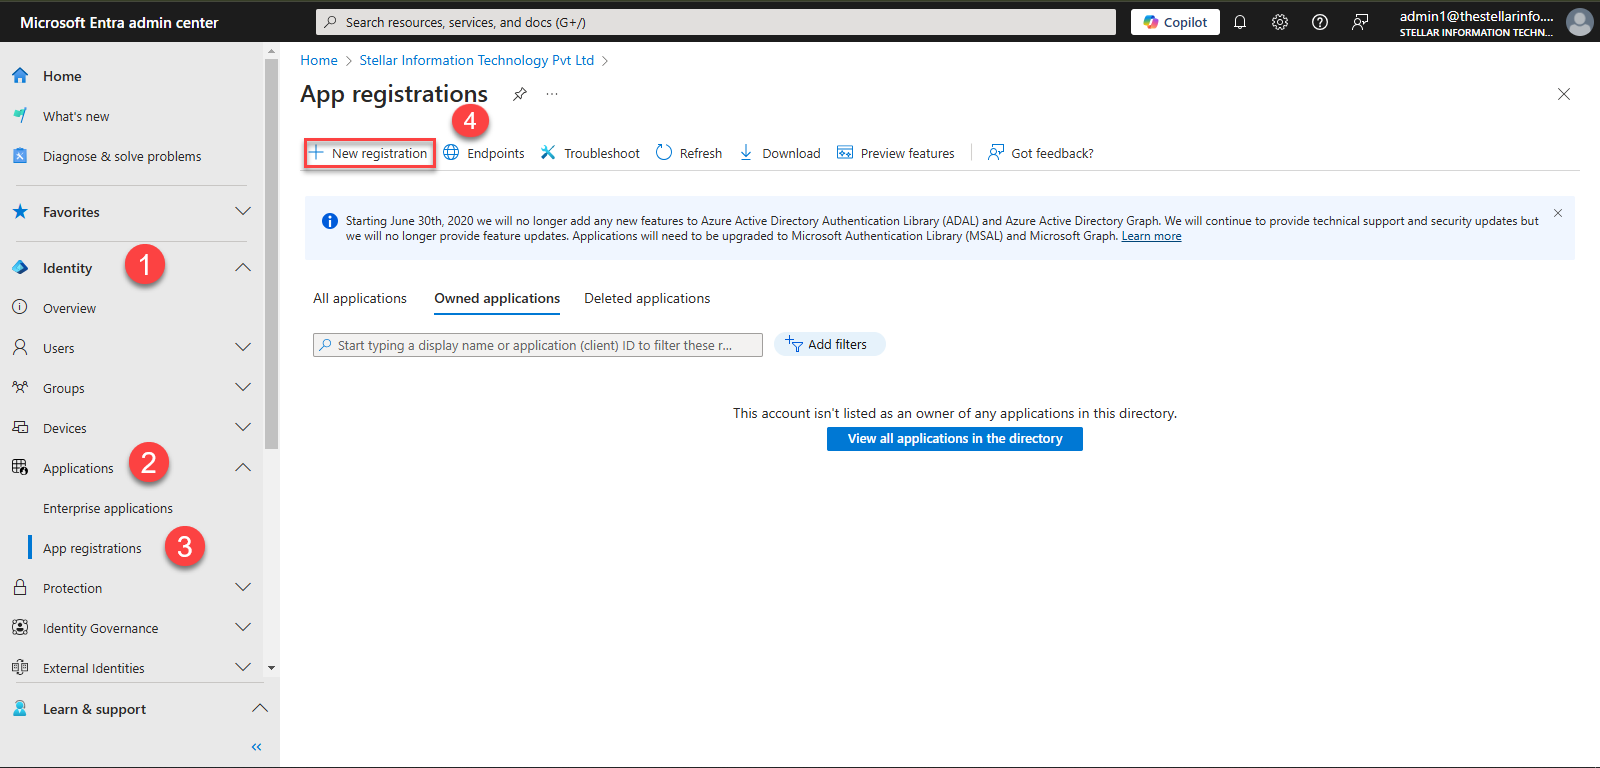
- Navigate to Identity > Applications > App
registrations.
- Click New registration. This opens
the Register an application page.
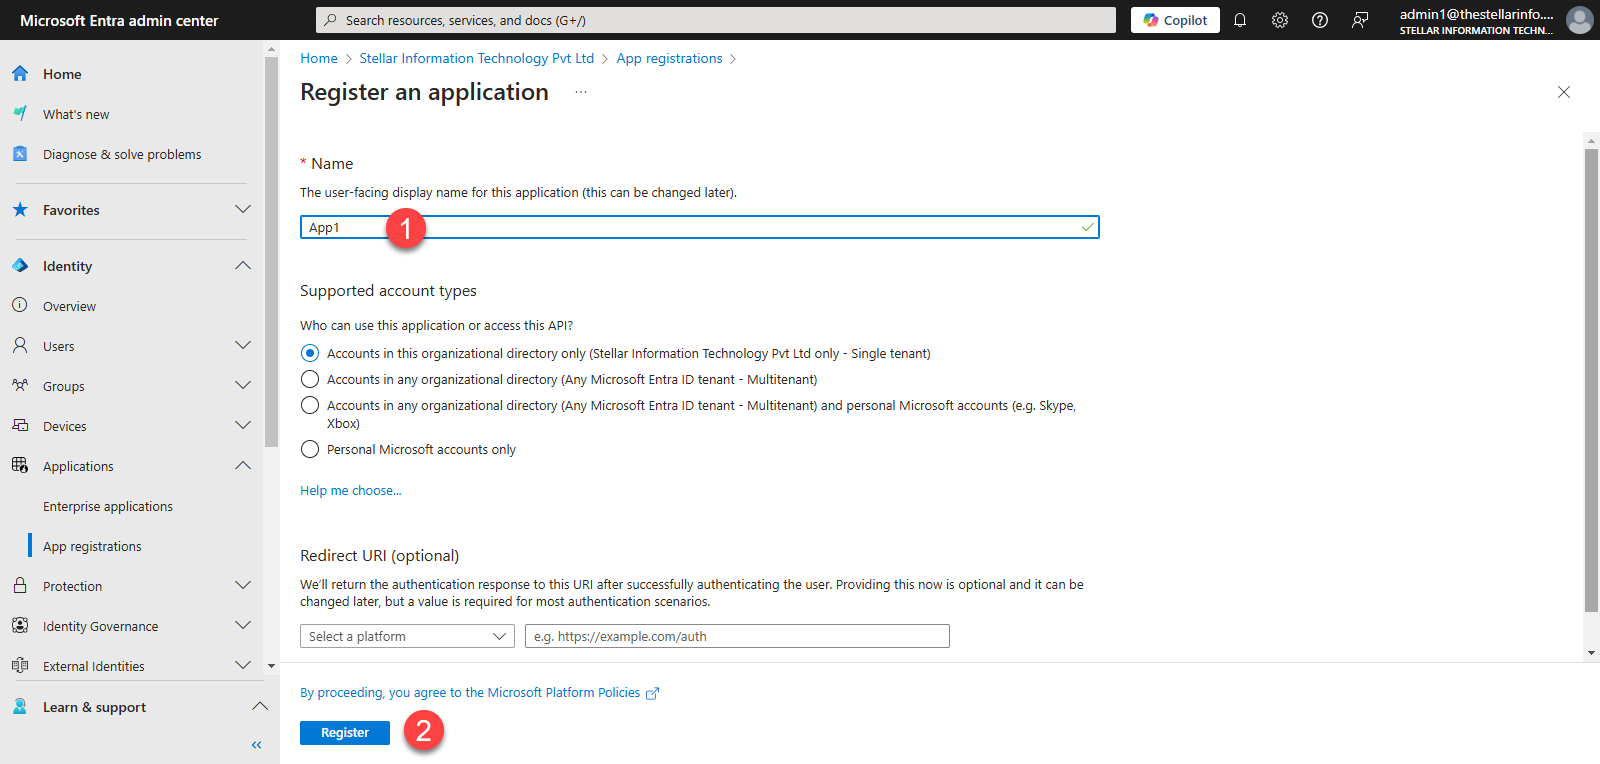
- In the Name field,
enter a name for the application (e.g., App1) and leave the default
settings for the other options, and click the Register button.
- Clicking the Register button
redirects you to the Application Overview page.
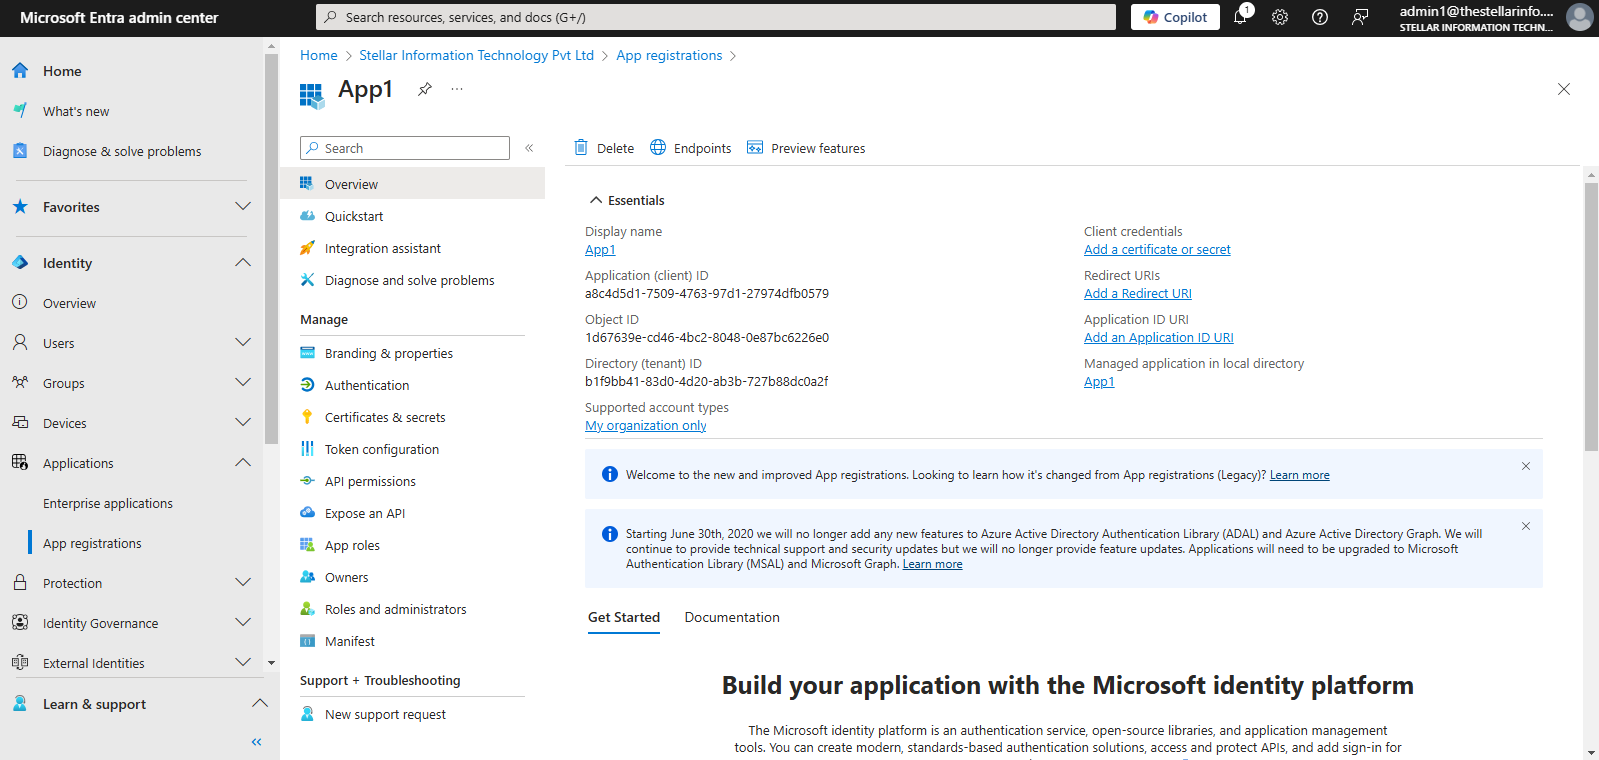
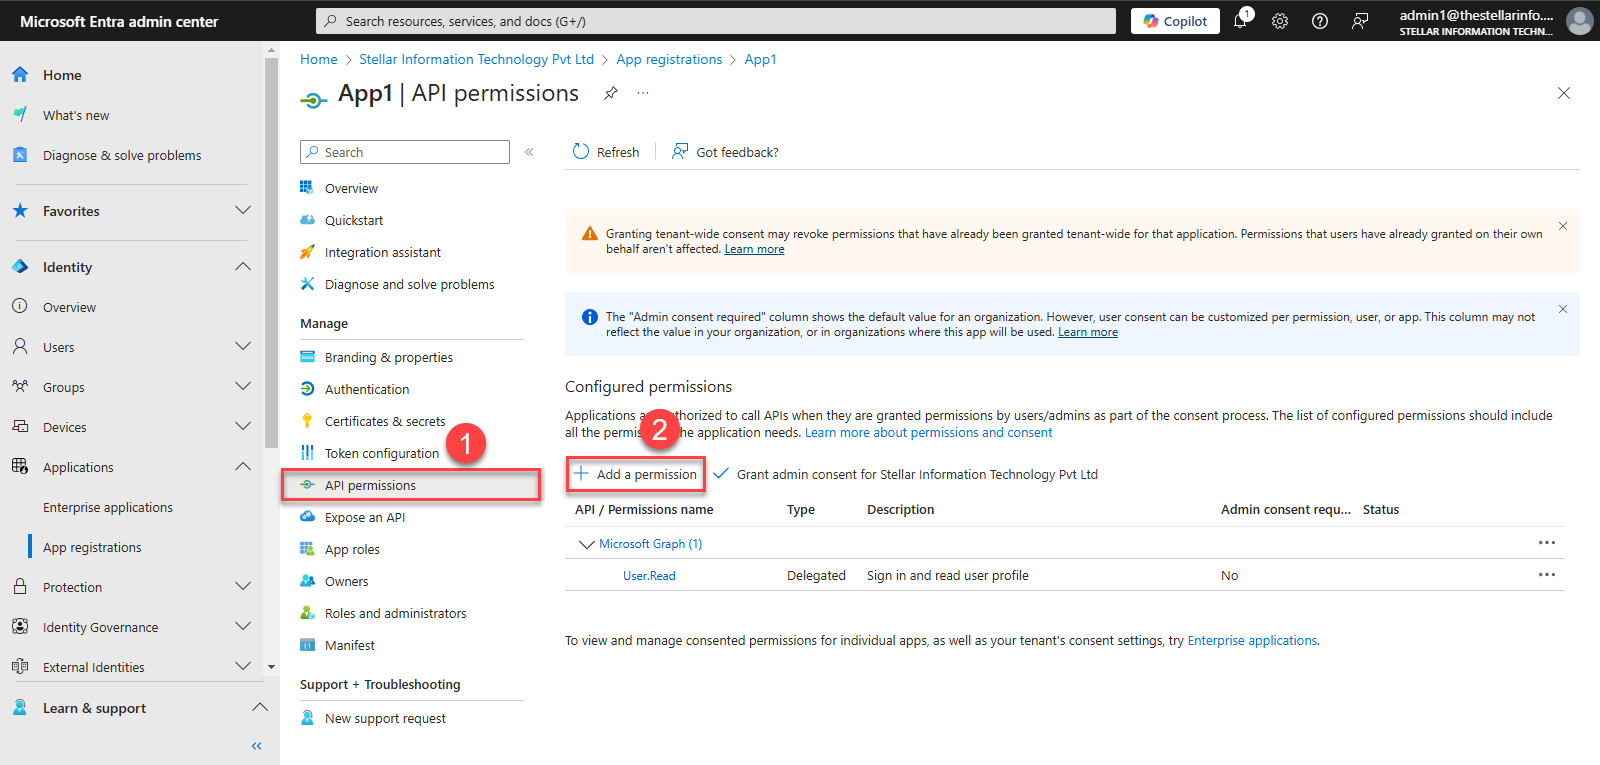
- On the application page, under the Manage section, click API
permissions. The API permissions page will
open.
- On the API permissions page, click
the Add a permission button.
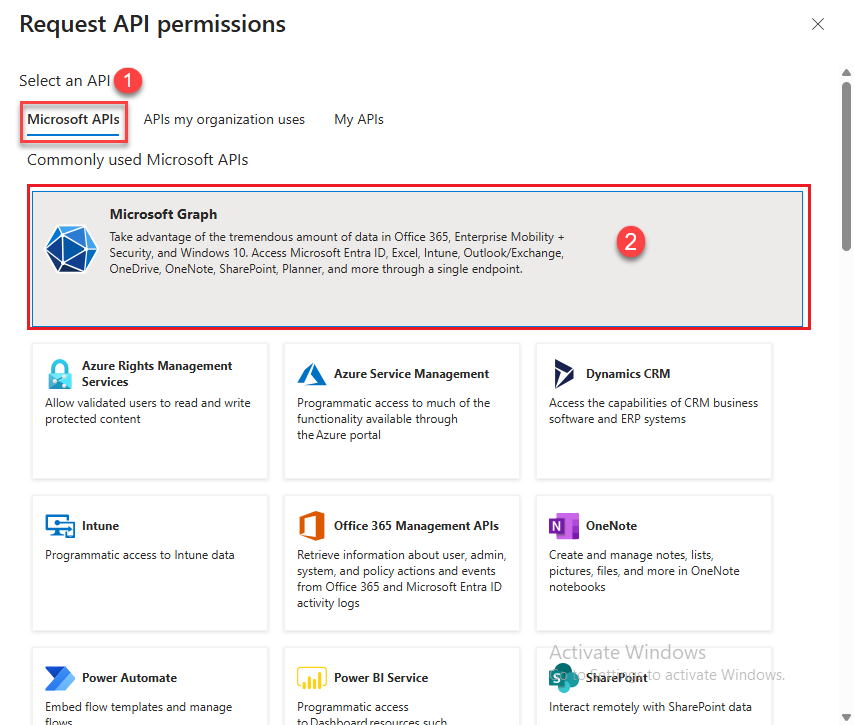
- Request API permissions pane opens. select Microsoft APIs >
Microsoft Graph.
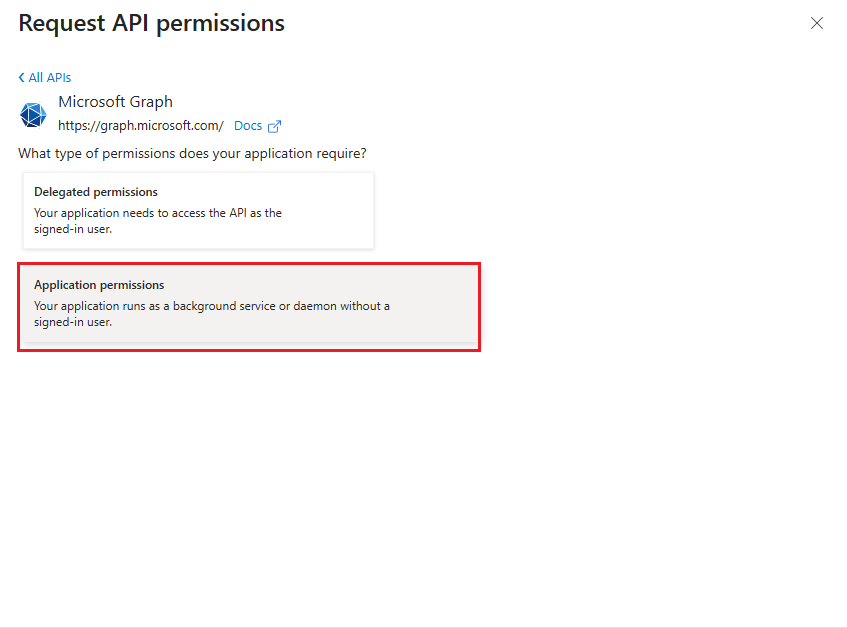
- In the Request API
permissions pane, click Application permissions.
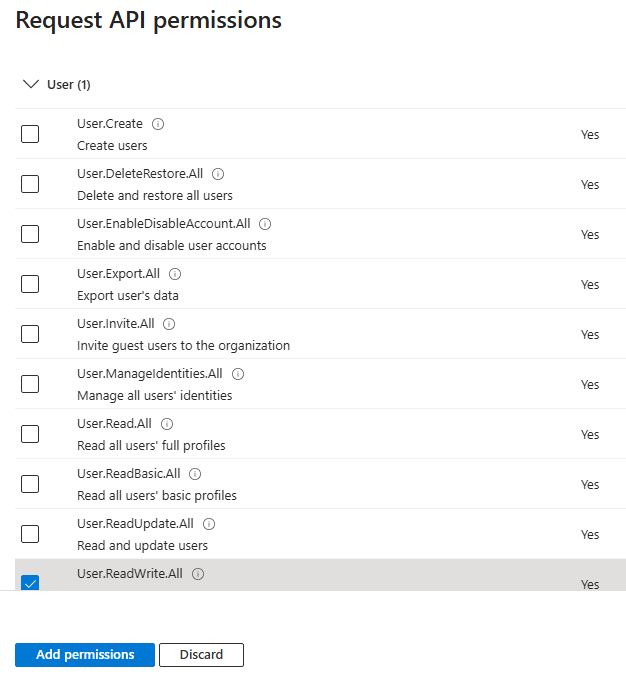
- Expand User, and then select User.ReadWrite.All
- Expand MailboxFolder,
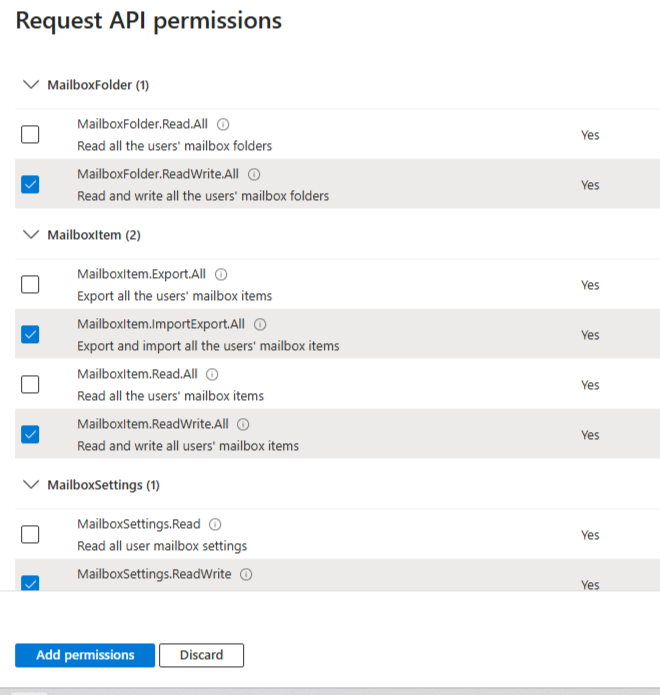
and then select MailboxFolder.ReadWrite.All
- Expand MailboxItem, and
then select MailboxItem.ImportExport.All and MailboxItem.ReadWrite.All
- Expand MailboxSettings, and then select MailboxSettings.ReadWrite
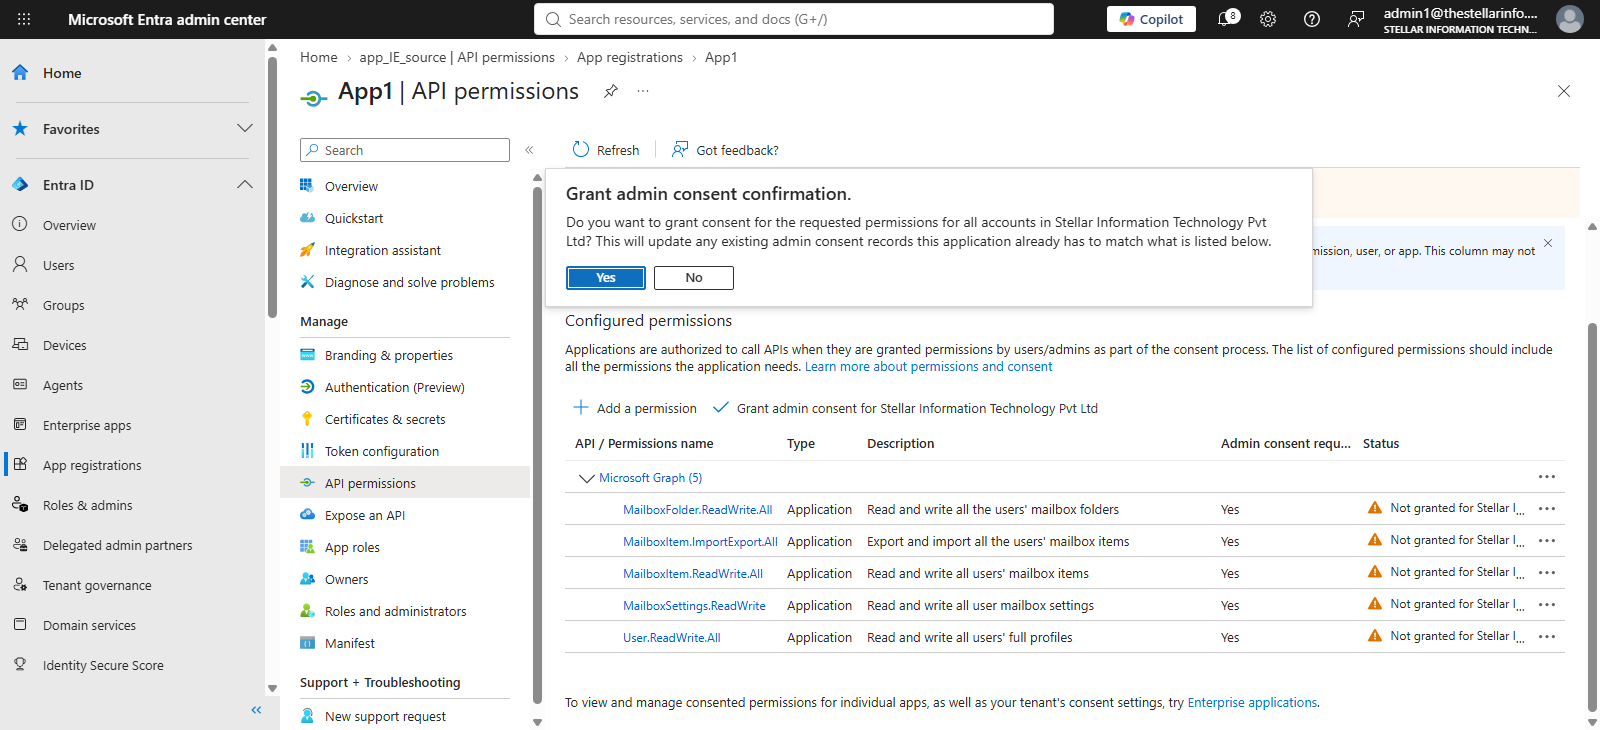
16. Back on the API permissions page, click the Grant admin consent for< your organization name> button (once it becomes available) and then click Yes to confirm.
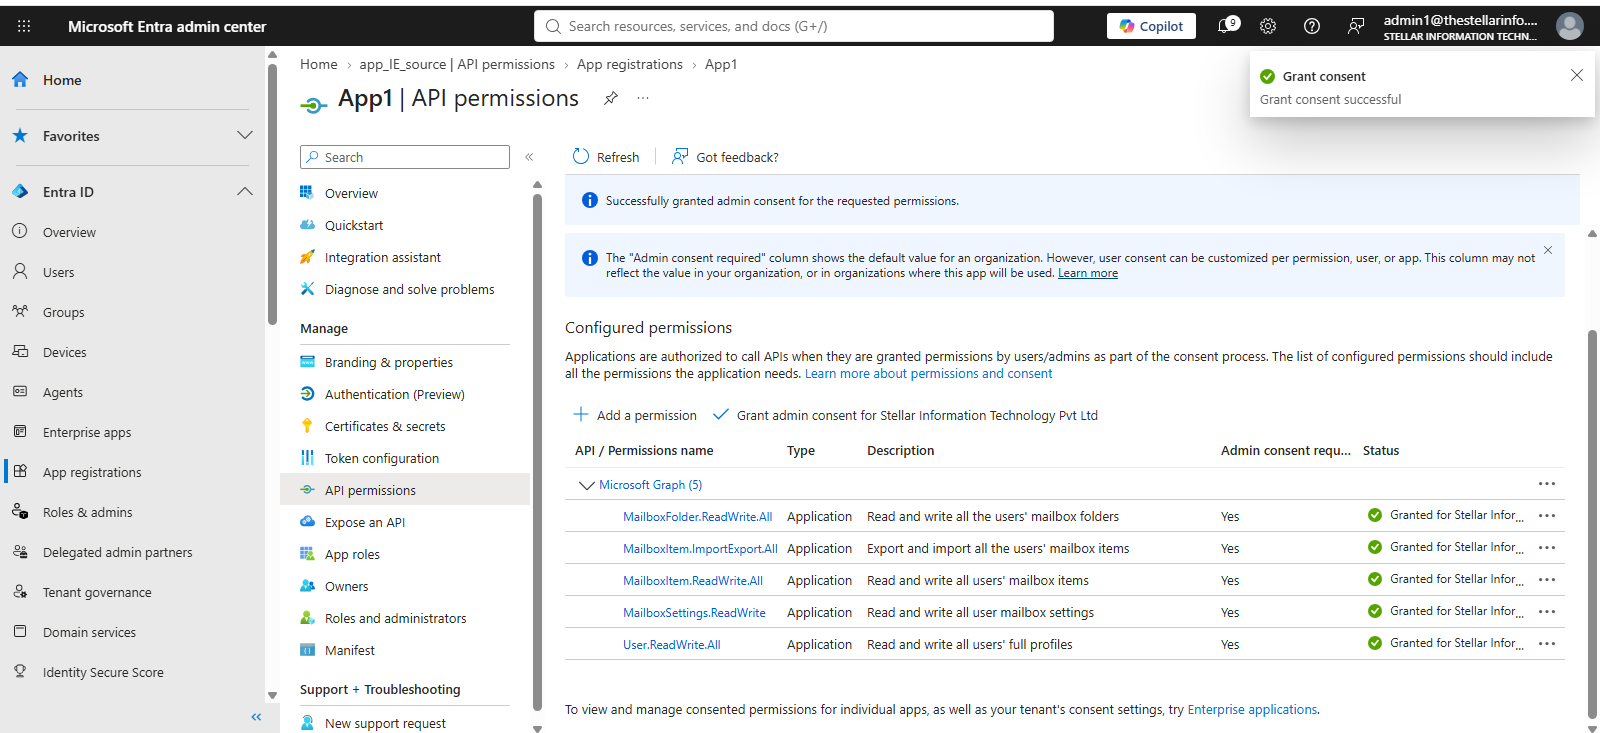
17. The screen below appears, indicating that consent has been successfully granted.
Assigning secrets in Entra ID
Add a client secret
(app password) to the newly registered application in Entra ID (Azure AD) to
ensure your application can authenticate successfully using the OAuth protocol.
Follow these steps to
configure the authentication method:
- Navigate to Identity > Applications > App
Registrations, then select the newly added application.
- In the navigation menu,
click Certificates & secrets. Now, you need to assign
either a certificate or client secret to the
application.
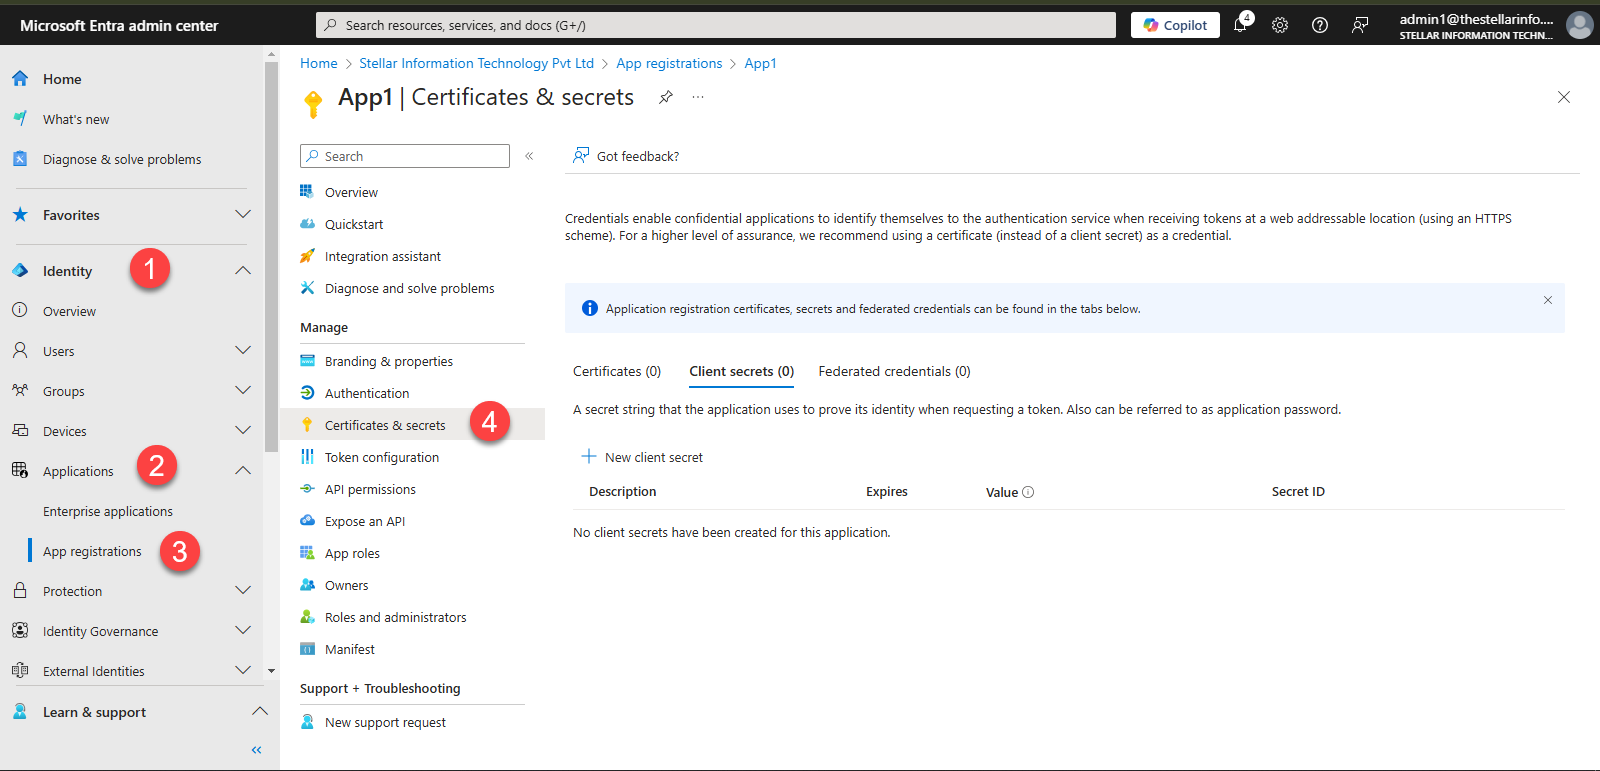
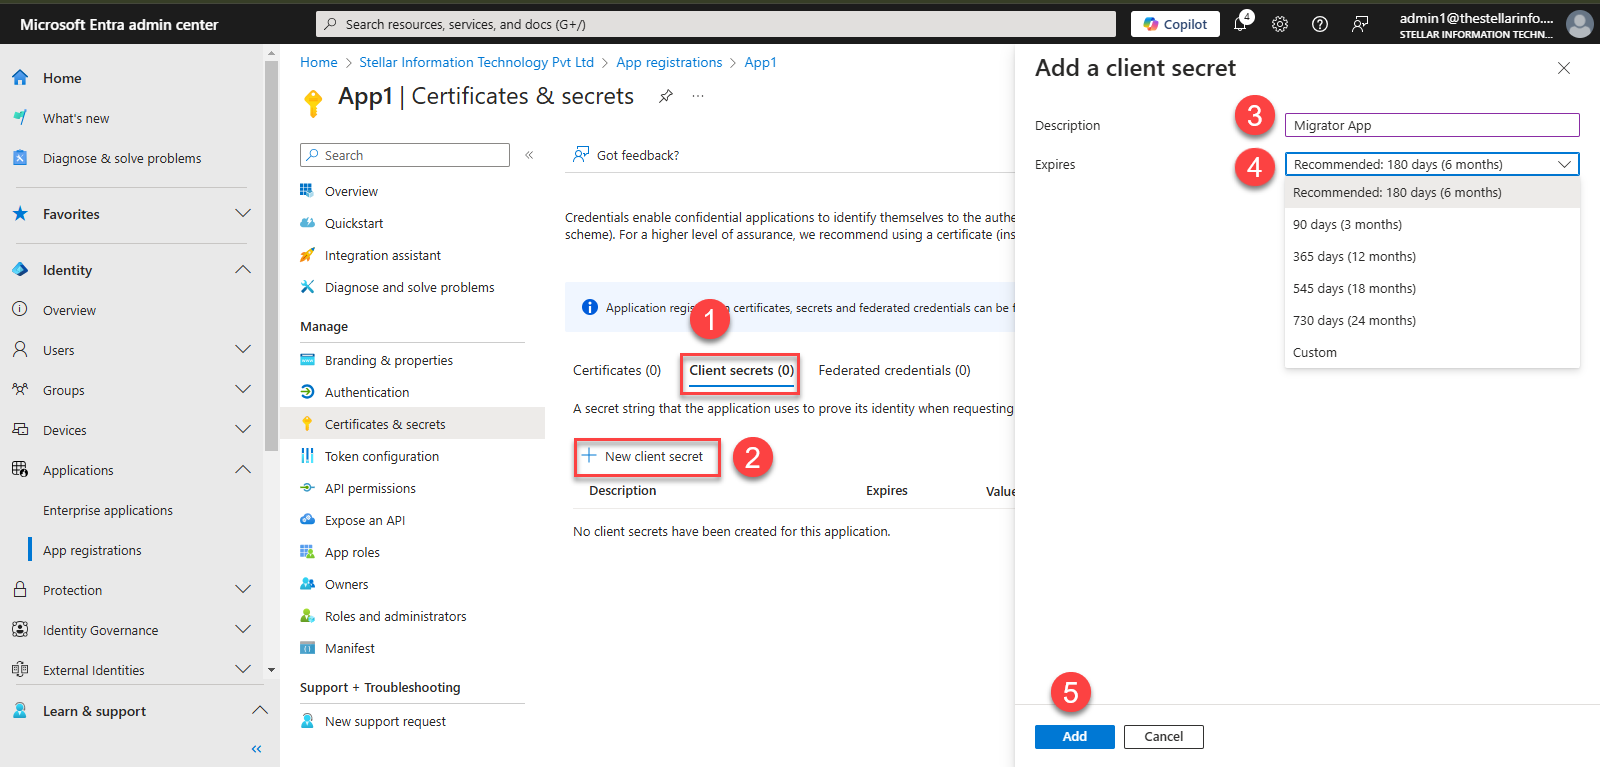
- To add a client secret,
click Client secrets > New client secret. Add
a client secret pane opens.
- In the Add a client
secret pane, enter a short description (e.g. Migration app),
select the expiration time (whichever suits your needs) from the drop-down
menu, and click Add.
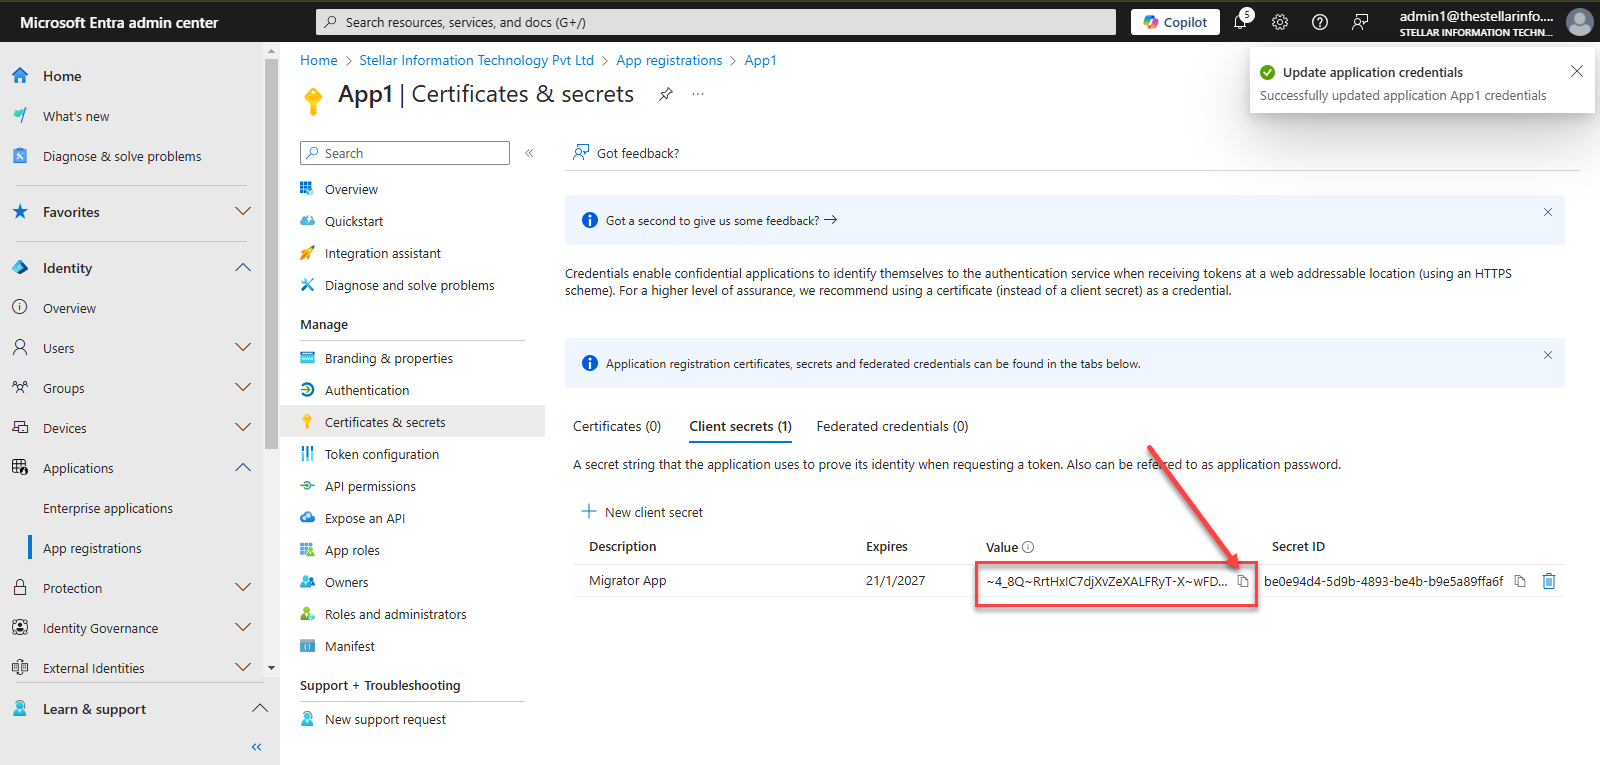
Note: Remember to copy the client secret value to your clipboard or
use it in your application right away, as it won't be accessible after
refreshing the page. If you miss it, a new client secret will need to be
created.
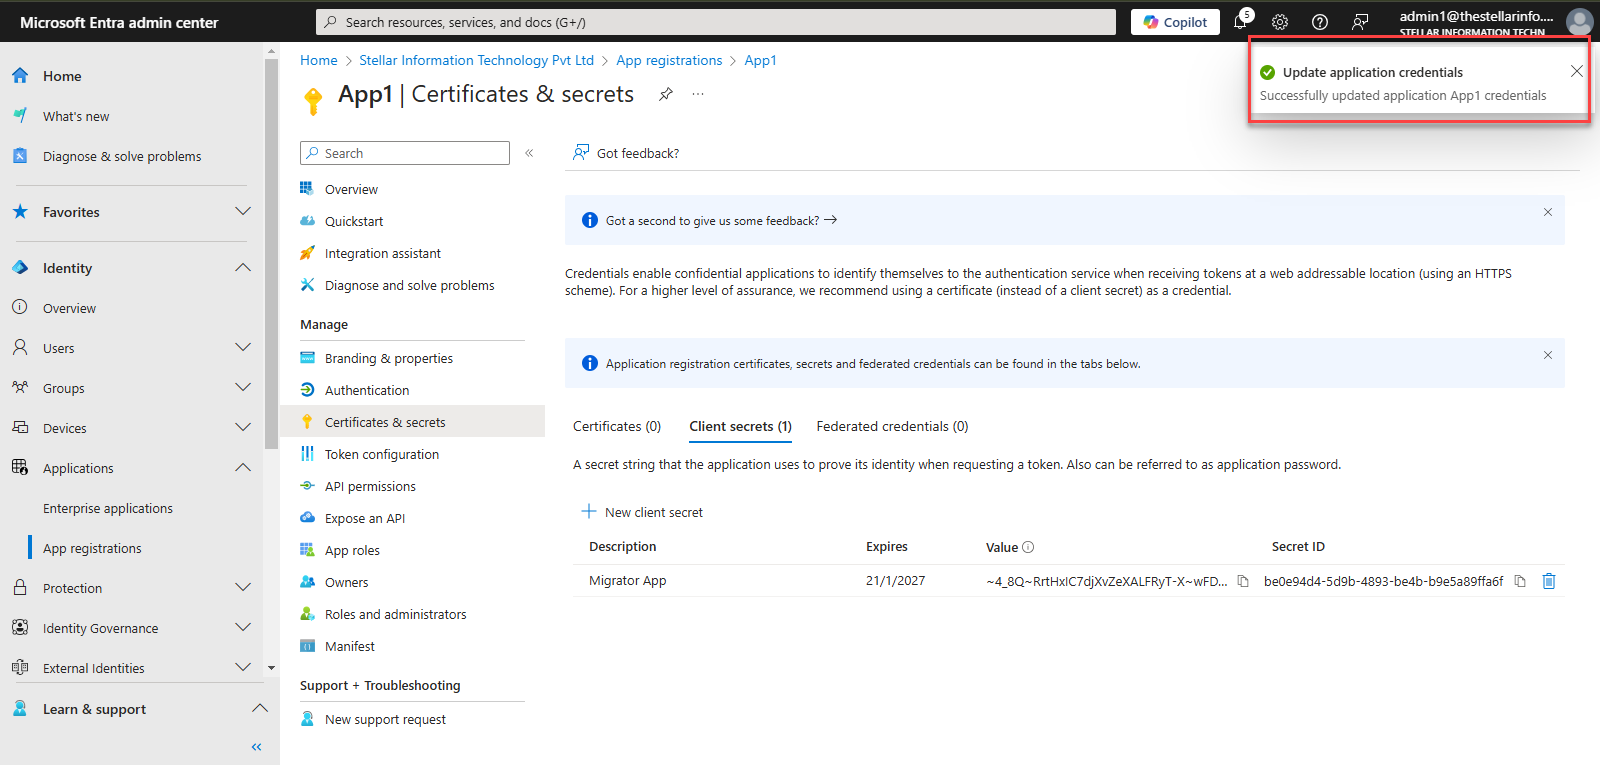
- Update application credentials message appears on the screen as shown below:
Locate Client ID and Tenant ID
- To view the application
details, click Identity > Application > App registration.
- On the App
registration page, click Owned applications and
then click View all applications in the
directory button.
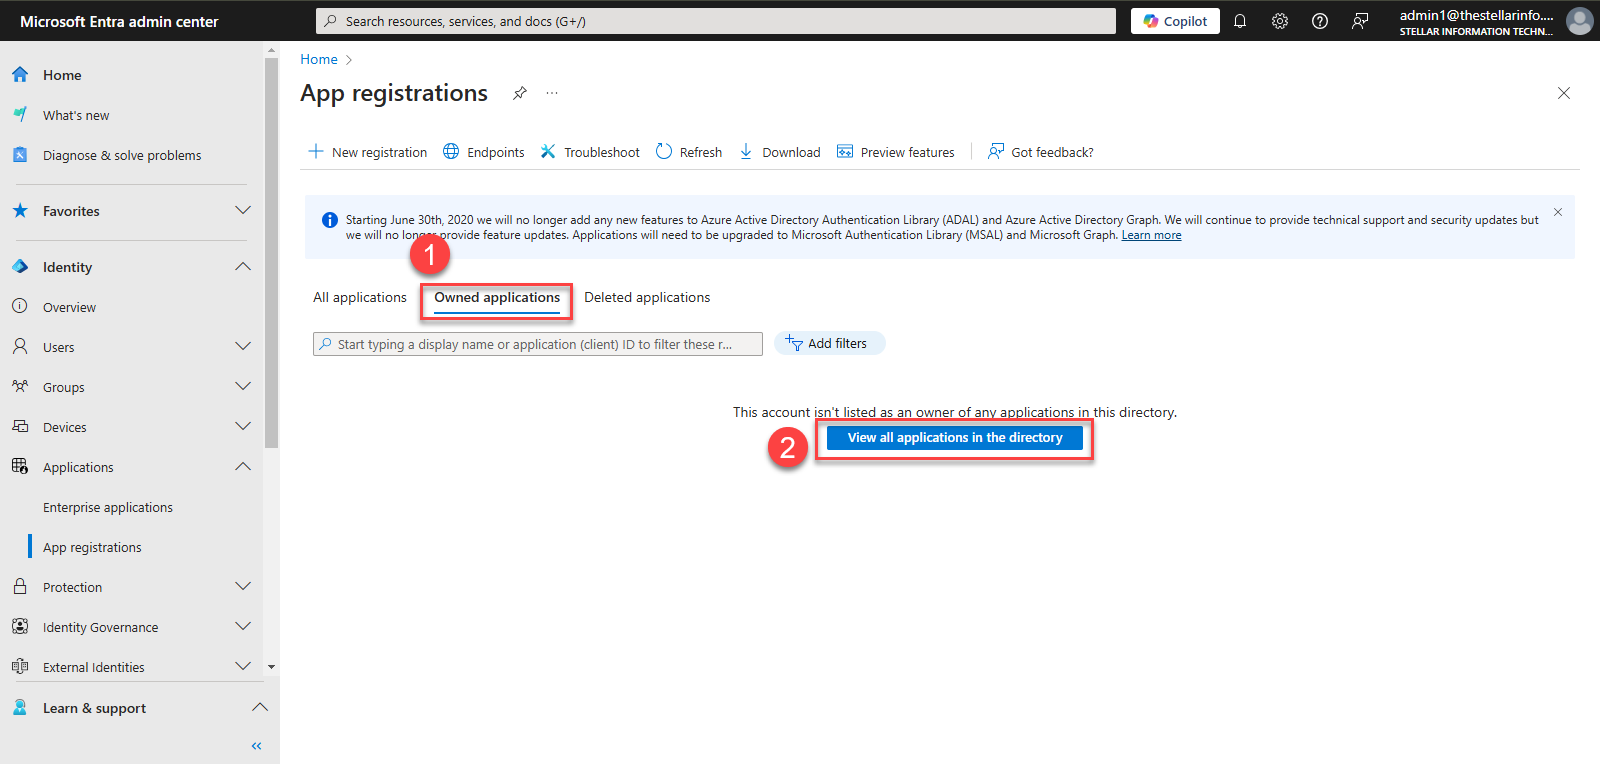
- Under the All
applications button, a list of applications will display. Click
on the application you registered.
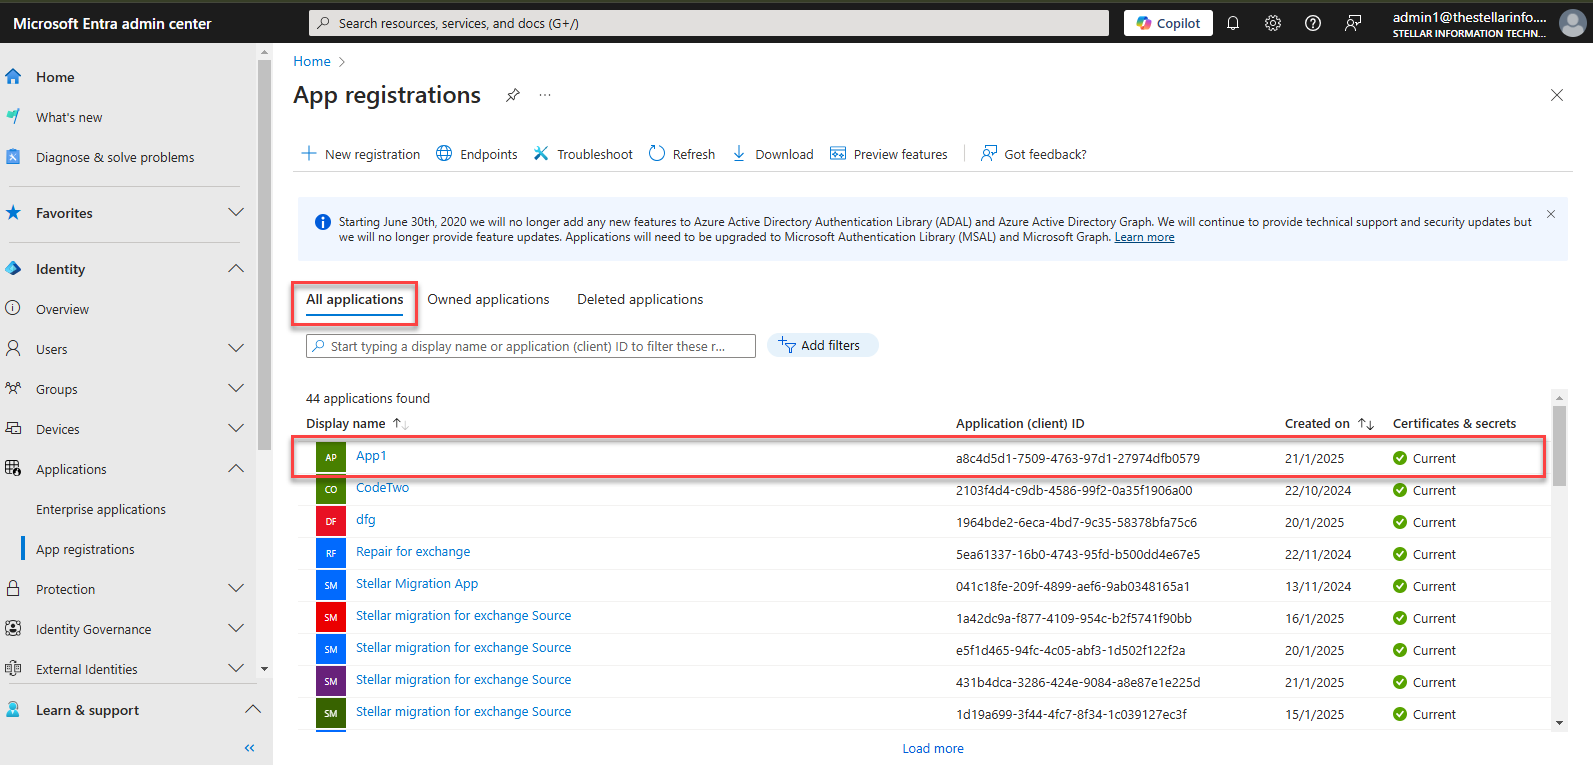
- All the necessary information
for the Application details step of the server connection
wizard is available in Entra ID, either on the application overview page
(including Application (client) ID and Directory
(tenant) ID) or on the Certificates & secrets page
(within the Client secrets tab).
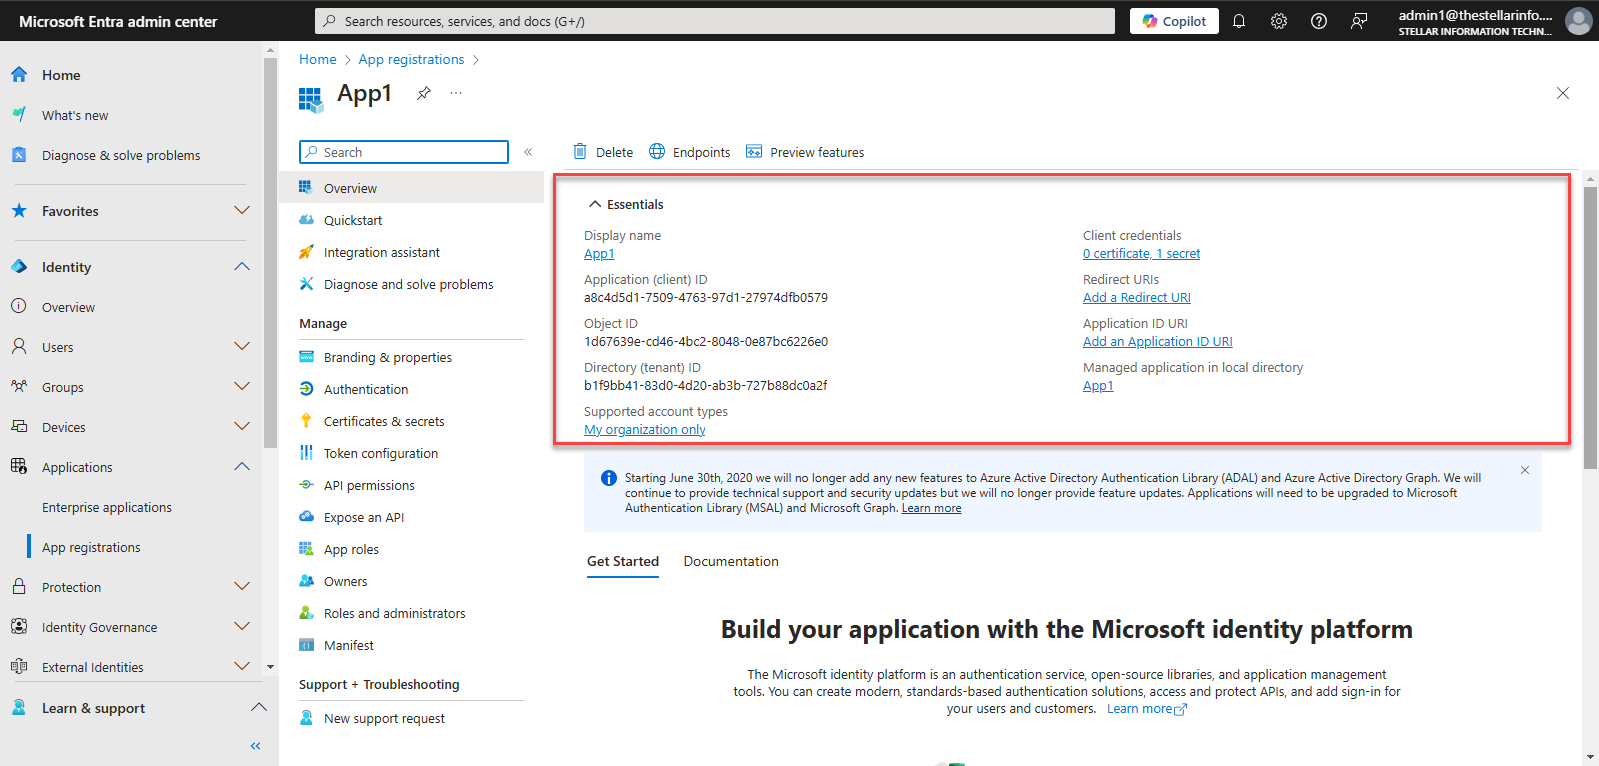
Note: You can also view both the Application (client) ID and Directory
(tenant) ID by directly navigating to the Overview tab
on the application page.
- Provide the registration details in the source and target server connection wizard in Stellar Migrator for Exchange software.