For Individuals
 Data Recovery
 File Repair
 Data Erasure
  For Business
 Email Repair
 Email Converter
 Email Migration
 File & Database Repair
  Toolkit
 Forensic
 Lab Services
 Our Partners
 About
About Company
 Leadership
  Media Coverage
 Press Releases
 Career
  Resources
 Case Studies
 Blogs
Blogs  Articles
  Videos
  Support
 Contact us

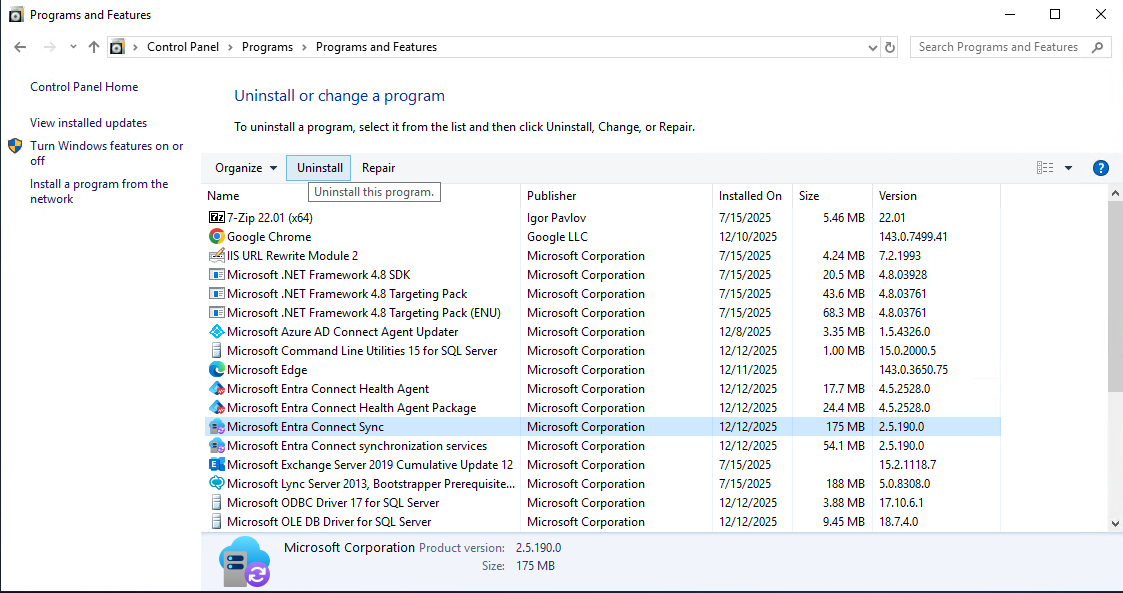
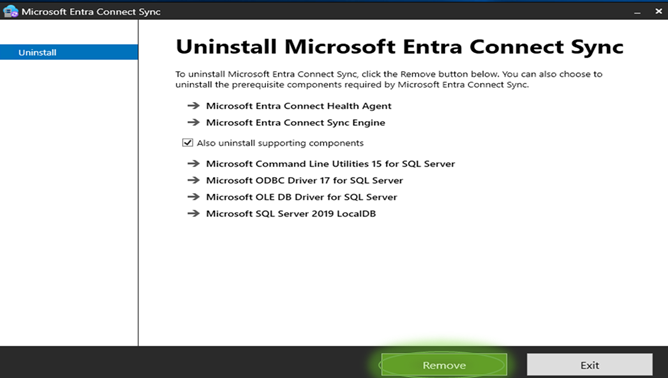
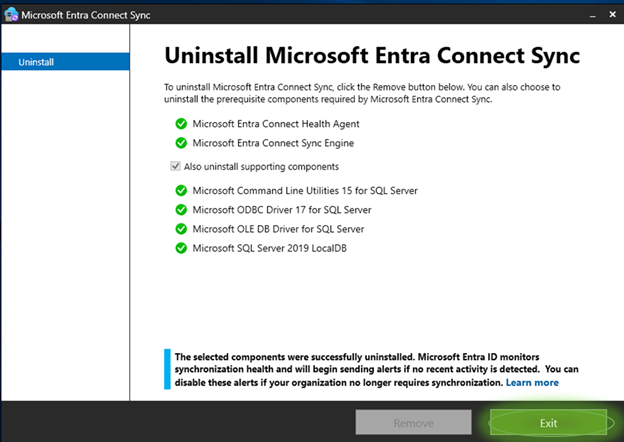
Step 1: Uninstall ‘Microsoft Entra Sync Connect’ from on-Prem Exchange server.
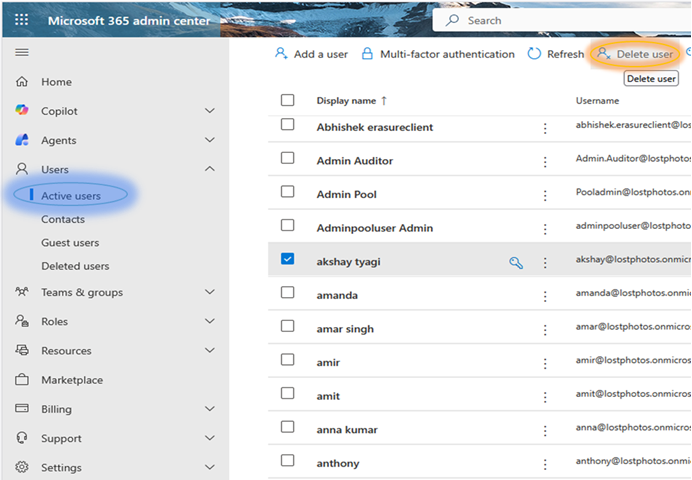
Step 2: Delete synced users from Microsoft Admin Center https://admin.cloud.microsoft.
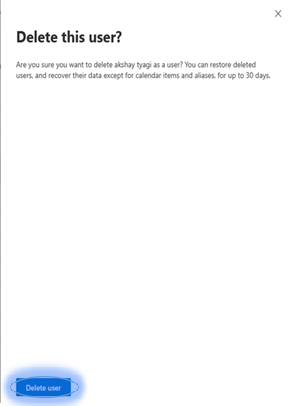
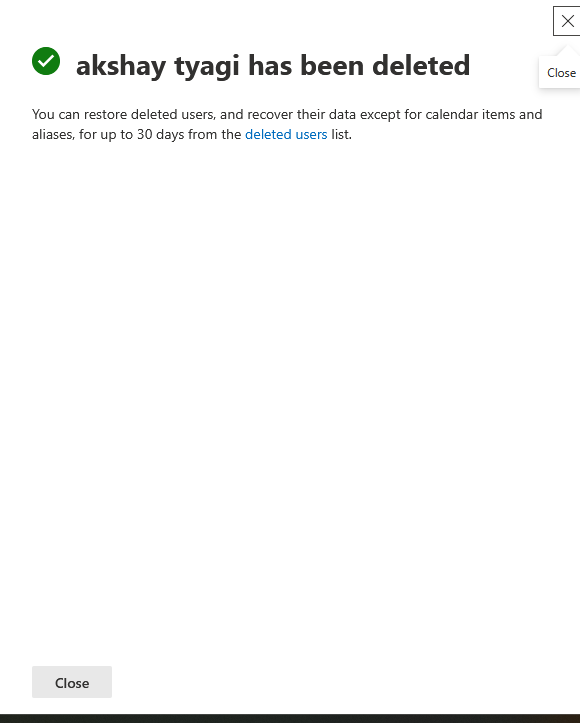
Step 3: Hard-deleting user mailboxes in the Microsoft Entra admin center.
1. Sign in to https://entra.microsoft.com/#home.
2. Navigate to Azure Active Directory (or Identity) > Users > Deleted users
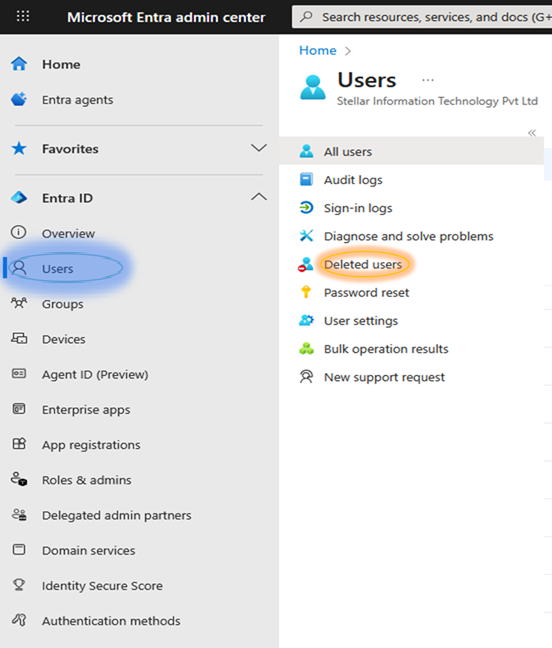
3. In the central pane, select the checkbox next to each user that you want to delete.
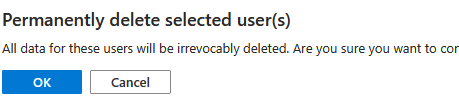
4. Click Delete permanently to hard-delete all selected users
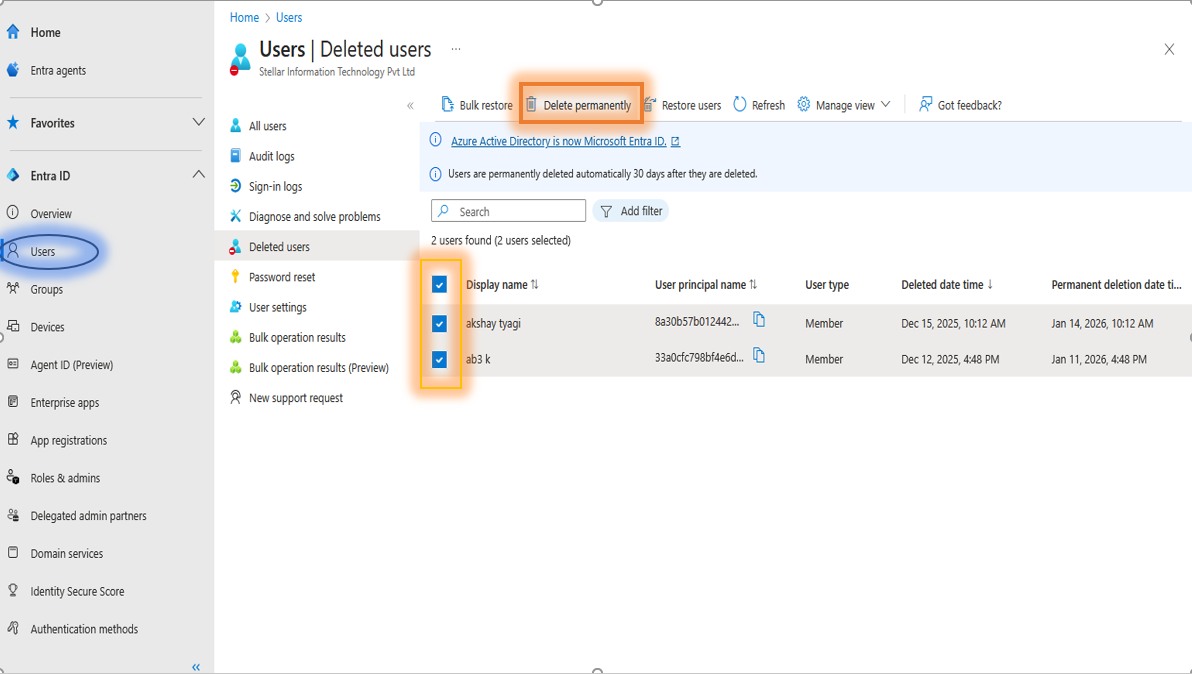
5. Click OK to confirm.
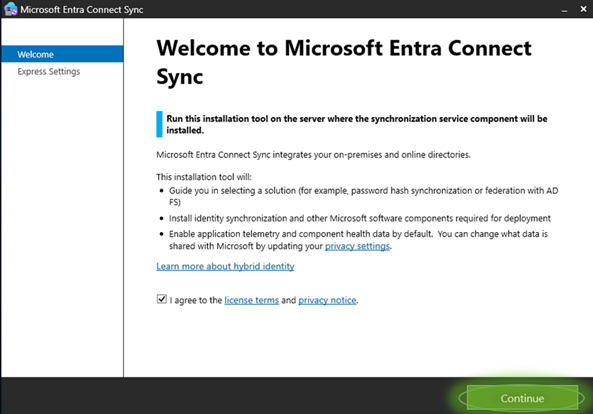
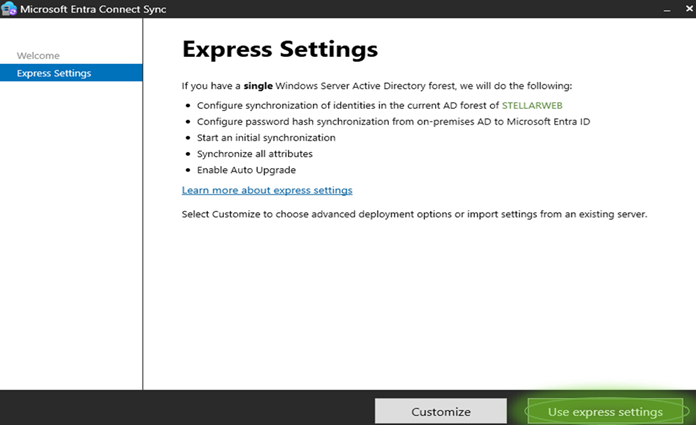
Step 3: Install Microsoft Entra Connect Sync
Download Link: https://download.msappproxy.net/Subscription/d3c8b69d-6bf7-42be-a529-3fe9c2e70c90/Connector/AADConnectSyncInstaller
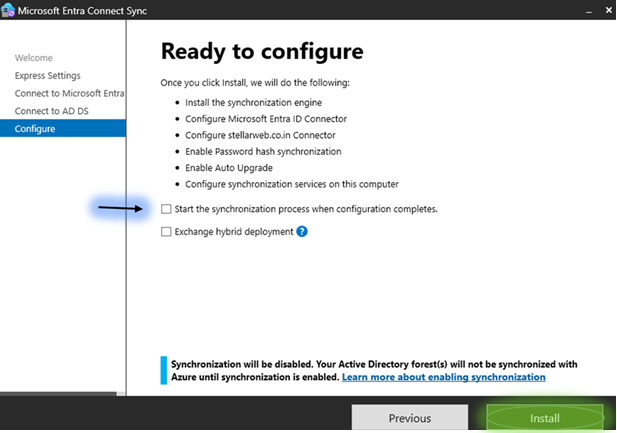
NOTE: Do not check the ‘Start the synchronization process when configuration completes.’
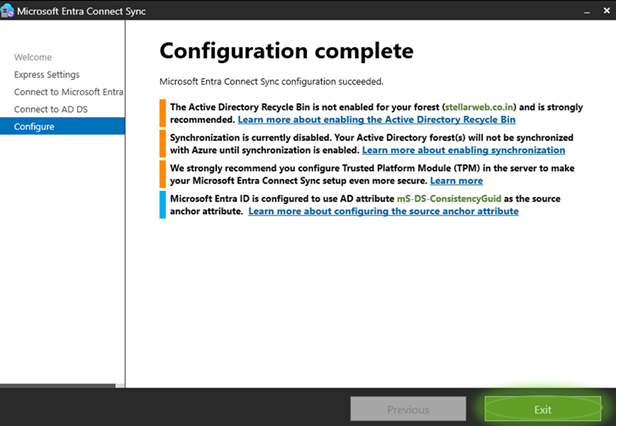
Step 4: How to (re)configure AD synchronization tools for migration to Microsoft 365
To (re)configure your AD synchronization for migration to Microsoft 365 via third-party software, you need to exclude the msExchMailboxGuid attribute from the syncing process. Follow the steps below.
1. Open Microsoft Entra Connect Sync.
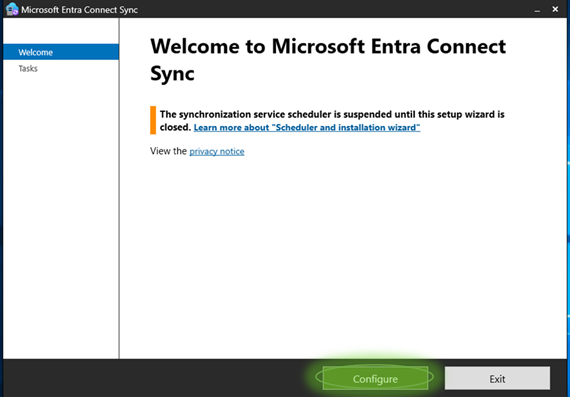
2. Click the Configure button to proceed to the next section (Tasks/Additional tasks).
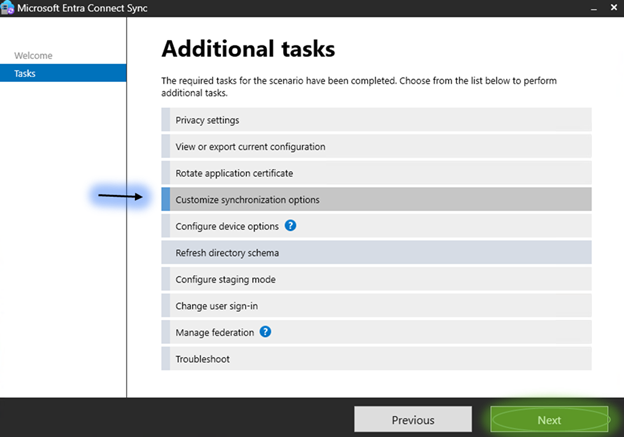
3. Choose Customize synchronization options from the list and click Next.
4. In the Connect to Azure AD section, provide your Entra ID (Azure AD) credentials.
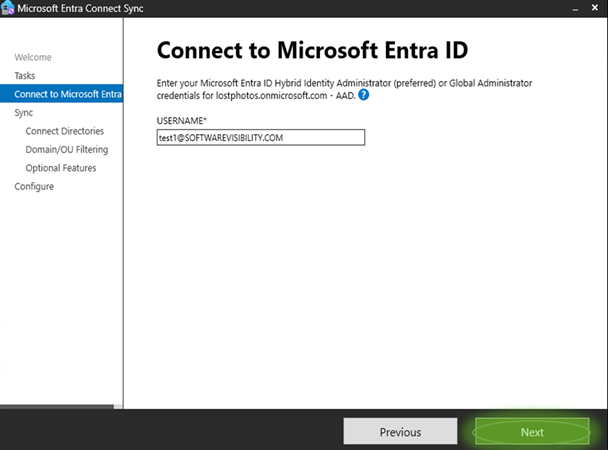
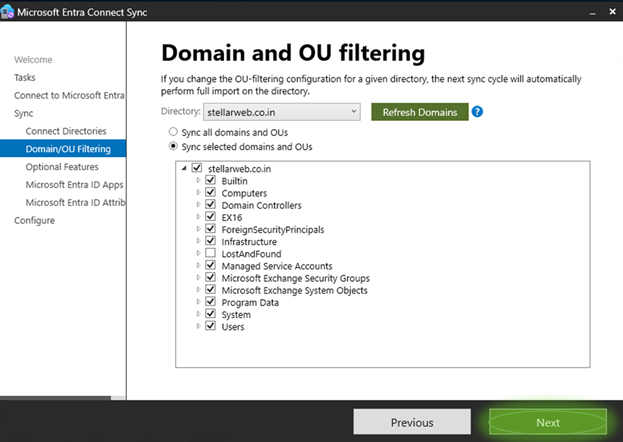
5. In the Domain/OU Filtering step, choose Organizational Units (e.g. HybridUsers, as shown in that you want to synchronize and click Next.
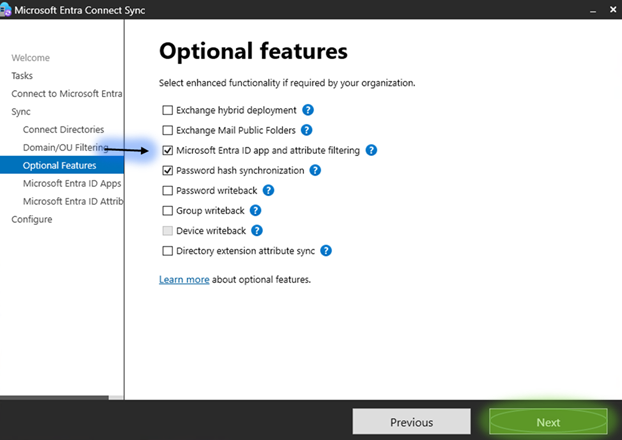
6. Proceed to the Optional Features step. Select (check) Microsoft Entra ID app and Attribute filtering and click Next.
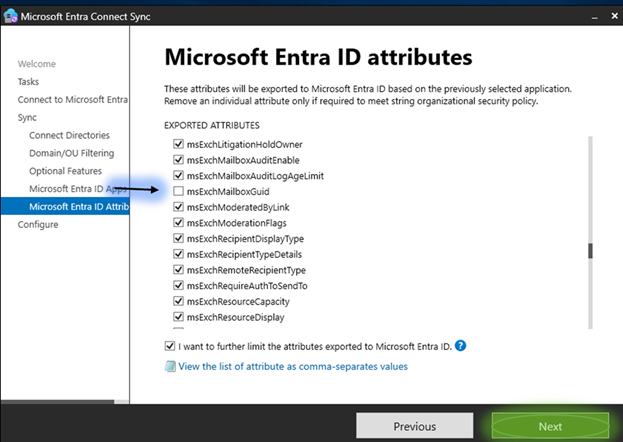
7. Proceed to the Azure AD Attributes step. Select I want to further limit the attributes exported to Azure AD and clear (uncheck) the msExchMailboxGuid check box.
8. Click Next to proceed to the last section (Configure). Ensure that the Start the synchronization process when configuration completes check box is selected.
9. Click Configure to start full synchronization.
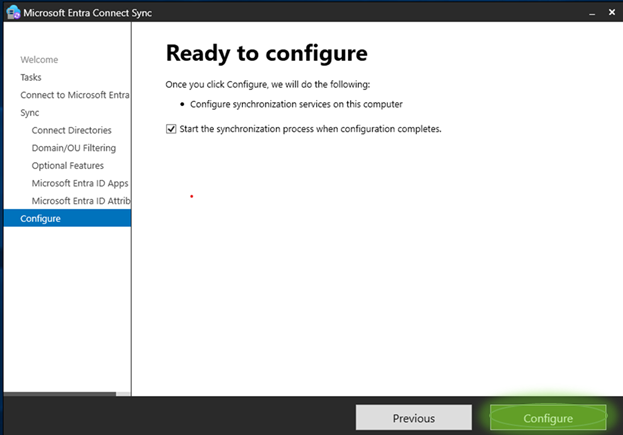
After the synchronization is finished, all the synced accounts will not have their msExchMailboxGuid attributes synced anymore.
After AD synchronization to office 365.
Step 5: Now you can Assign license to users on Microsoft 365 and the mailbox will created with different Guid
1. https://admin.cloud.microsoft Using this link open Microsoft Admin Centre.
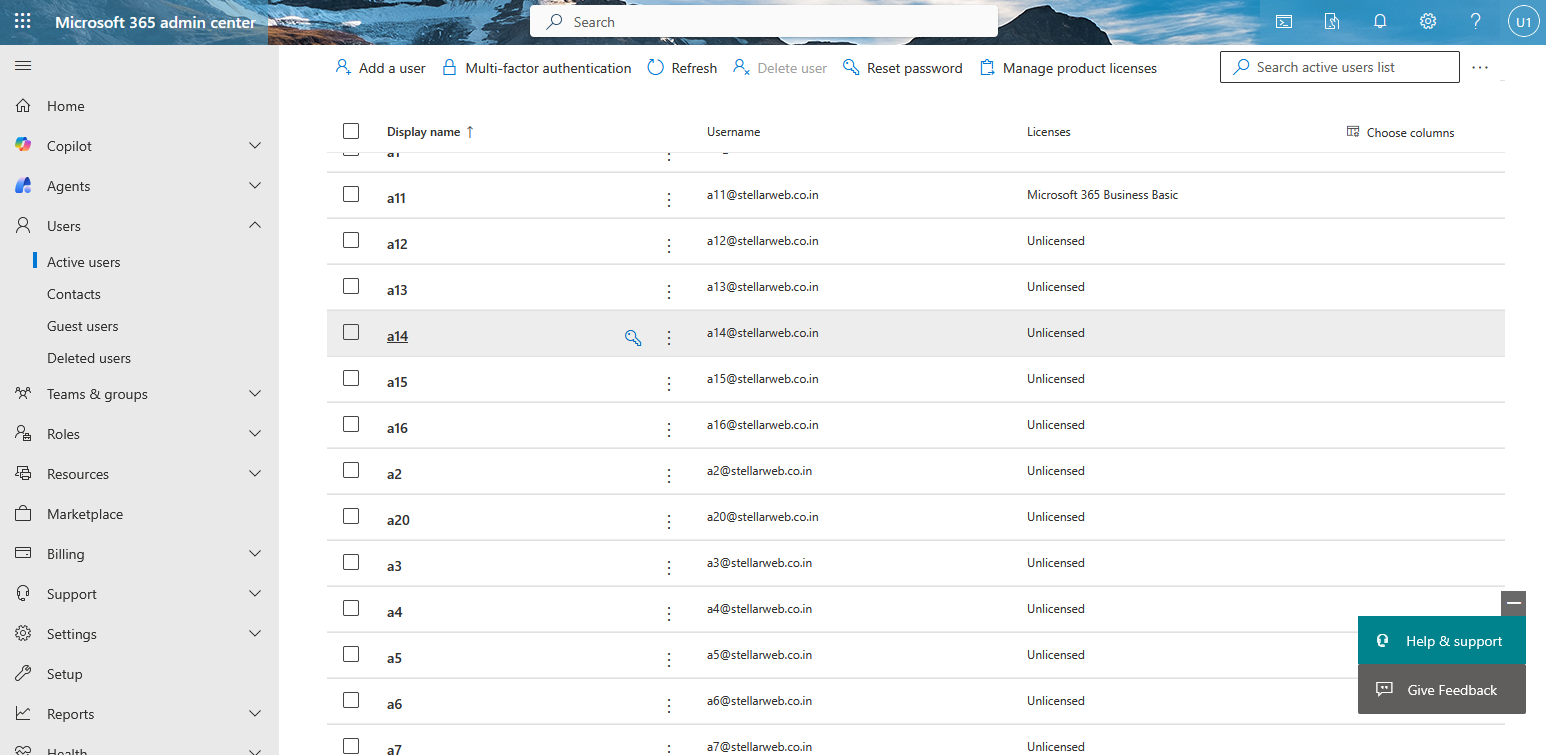
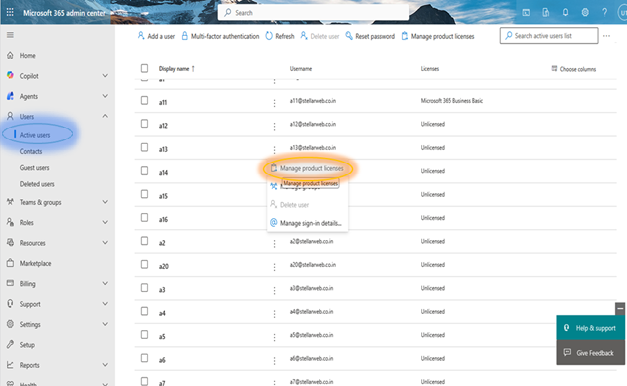
2. Now Click On manage Product License ,A Corner Dialog will Appear
3. Now assign your license which you have Business Basic /P1 /P2
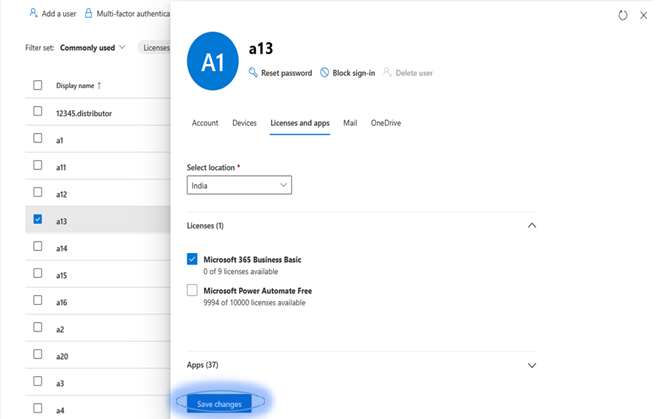
4. Click On Save Changes , You will get this conformation

5. On Clicking on Mail , You see your Mailbox and its Settings . If, it is not updated Click on refresh button in corner of Dialog one or two times.
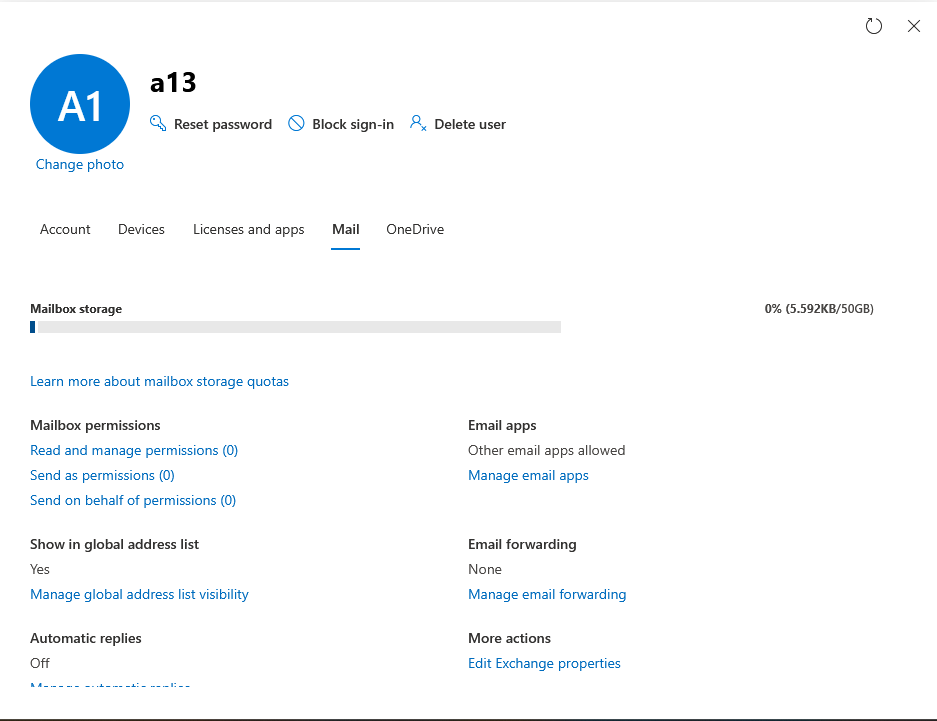
Now you are fully prepared for Migration, Ready to go Migration Through our tool.